

⏩ Table of contents
📖 About the Project🔍 Features🛠 Built With🏃♂️ Getting Started🛫 Quick Start📂 Directory Structure👨💻 Starting Development🚢 Deploy your own🛠️ Author📝 License
📖 About the Project
CRUD is a starter template that provides a comprehensive setup for building a web app using the React.js and vite.js framework. Don’t worry about the configuration
The application allows users to create, read, update, and delete data records in mockAPI.io. The user interface is built using React. This template give you the end to end type safety. Additionally, it includes a range of popular libraries and tools, such as Prettier, ESLint, and Tailwind CSS, to ensure that the code is well-formatted and follows best practices.
🔍 Features
📱 Responsive UI with Tailwindcss🎯 Make Development simple🐞 Vscode debugging🔥 Hot Module Replacement(HMR)💪 Eslint, Prettier and Airbnb make your code stronger🖥 Build your application for multi-platform
🛠 Built With
CRUD Built With
🏃♂️ Getting Started
These instructions will get you a copy of the CRUD and running on your local machine for development and testing purposes. See Deploy for notes on how to lunch your PWA app in live.
📚 Before You Begin
Before you begin i recommend you read about the basic building blocks that assemble a CRUD:
-
React.js – React’s Official Website is a great starting point. You can also use W3Schools Popular Guide, and Egghead Videos.
-
TypeScript – Go through TypeScript Official Website and proceed to their Official Manual, which should help you understand TypeScript better.
-
Node.js – Start by going through Node.js Official Website and this StackOverflow Thread, which should get you going with the Node.js platform in no time.
🖥️ Prerequisites
Make sure you have installed all of the following prerequisites on your development machine:
- Git – Download & Install Git. OSX and Linux machines typically have this already installed.
- Node.js – Download & Install Node.js and the npm package manager. If you encounter any problems, you can also use this GitHub Gist to install Node.js.
NOTE: This project requires NodeJS (version 14 or later) and NPM.
Node and NPM are really easy to install.
🛫 Quick Start
There are several ways you can get the CRUD:
🌀 Cloning The GitHub Repository
The recommended way to get CRUD is to use git to directly clone the repository:
This will clone the latest version of the CRUD repository to a CRUD folder.
🗃️ Downloading The Repository Zip File
Another way to use the CRUD is to download a zip copy from the main branch on GitHub. You can also do this using the wget command:
wget https://github.com/AjayKanniyappan/CRUD/archive/refs/heads/main.zip -O CRUD.zip; unzip CRUD.zip; rm CRUD.zip
Don’t forget to rename CRUD-main after your project name.
🧰 Quick Install
Once you’ve downloaded the Template and installed all the prerequisites, you’re just a few steps away from starting to develop your CRUD Web App using React.js.
The Template comes pre-bundled with a package.json file that contain the list of modules you need to start your application.
To install the dependencies, run this in the application folder from the command-line:
# Install dependency
npm install
Or if you prefer using Yarn:
# Install dependency
yarn install
This command does a few things:
- First it will install the dependencies needed for the application to run.
- If you’re running in a development environment, it will then also install development dependencies needed for testing and running your application.
📂 Directory Structure
CRUD files and folder structure.
+├── .husky                       Automate your git commits
 ├── .dist                        Contains the minimized version of the source code
+├── .vscode                      vscode debug folder and extension support
 │
+├── public                       Project assets folder
 │   └── NxN.svg                  Contains icons and logos
 │
+├── src                          Source code folder
 │   ├── components               This folder consists of a collection of UI components
 │   ├── constants                It contains constant urls and data
 │   ├── hooks                    It contains custom hooks for all pages
 │   ├── layouts                  It contains page layout
 │   ├── services                 It contains API Services
 │   ├── styles                   It contains css styles
 │   ├── svg                      It contains SVG Vectors
 │   ├── types                    Typescript types declaration folder
 │   ├── App.tsx                  It contains Components and Routes
 │  +└── main.tsx                 Starting point of the application
 │
 ├── .editorconfig                EditorConfig for defining coding styles
 ├── .eslintrc.json               Eslint configurations
 ├── .prettierrc                  prettier code formatter
+├── index.html                   index path
+├── package.json                 Package.json for development
 |── postcss.config.js            Post CSS configurations
+├── tailwind.config.js           Tailwind CSS configurations
 ├── tsconfig.json                TypeScript Configuration
+├── tsconfig.node.json           TypeScript paths
+└── vite.config.ts               Vite and React.js configurations
👨💻 Starting Development
Use your favorite JavaScript Package Managers npm or yarn or pnpm
🏃 Running Your Application
Run your application using npm:
npm run dev
Or if you prefer using Yarn:
yarn dev
Your React.js application should run on port 5050 with the development environment configuration, so in your browser just go to http://localhost:5050
That’s it! Your application should be running. To proceed with your development, check the other sections in this documentation. If you encounter any problems, Feel free to check issues page.
🛬 Change Port Number
If the localhost 5050 port number already in use! or if you like to change your React.js application number.
Go to
🆚 Vscode Debugging
This guide goes over how to start VSCode debugging your React.js Project.
you can easily debug this CRUD.
To bring up the Run and Debug view, select the Run and Debug icon in the Activity Bar on the side of VS Code. You can also use the keyboard shortcut Ctrl+Shift+D.
Click the button or press F5 to start debugging
🧹 Clean Cache
If you want clean the cache files and node_modules cache run this below command
npm run clean
NOTE: It will remove your node_module folder, build files and env files.
💈 Style your Code
The CRUD has Eslint, Prettier and Airbnb Configurations, this will help you to Style your code and syntax check and more.
Eslint will check syntax, find problems, and enforce code style of your code.
Prettier will format your code style.
All you have to do is run this below command
npm run lint
NOTE: This command show you the warnings and errors in your code.
🛰️ Git Commits
Automate your Git commits using Husky, and don’t commit or push the bad code in git.
Husky improves your commits and more, You can use it to lint your commit messages, run tests, lint code, etc… when you commit or push. Husky supports all Git hooks.
Run below command
npm run prepare
See docs and more about Husky.
That’s it! Your application should be running. To proceed with your development, check the other sections in this documentation. If you encounter any problems, Feel free to check issues page.
🚢 Deploy your own
Congratulations, you are ready to deploy your CRUD to production. This document will teach how to deploy vercel or self-hosted.
🔼 Vercel
The easiest way to deploy React.js to production is to use the Vercel platform developed by the creators of React.js.
NOTE: If you want to read more about vercel, kindly read this
👻 Self-Hosting
CRUD can be deployed to any hosting provider that supports Node.js.
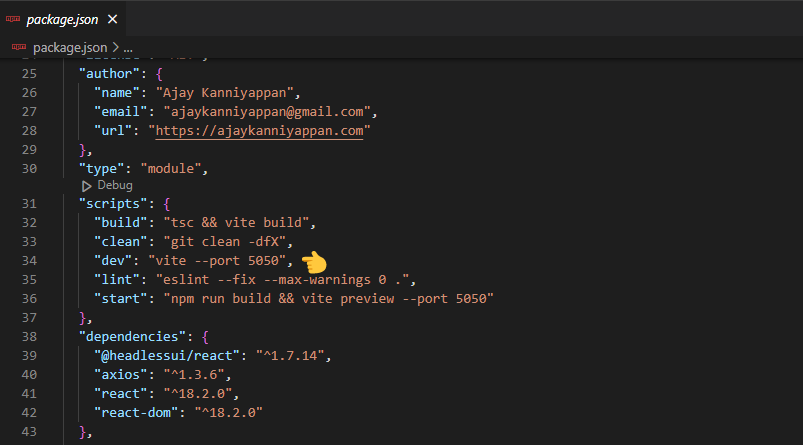
If you’ve followed the instructions so far, your package.json should have the following build and start scripts:
"scripts": {
    "build": "tsc && vite build",
    "clean": "git clean -dfX",
    "dev": "vite --port 5050",
    "lint": "eslint --fix --max-warnings 0 .",
    "prepare": "husky install",
    "start": "npm run build && vite preview --port 5050"
  }
npm run build
In your own hosting provider, run the build script once, which builds the production application in the .dist folder.
After building, the start script starts a Node.js server that supports hybrid pages, serving both statically generated and server-side rendered pages, and API Routes.
npm run start
NOTE: If you want to read more about deployment, kindly read this
🛠️ Author
- Website: https://ajaykanniyappan.com
- Twitter: @AjayKanniyappan
- Github: AjayKanniyappan
- LinkedIn: Ajay Kanniyappan
📝 License
MIT License © Ajay Kanniyappan