

In this article, we will be using Socket.io and HarperDB to build a fullstack, real-time chat application with chat rooms.
This will be a great project to learn how to put together fullstack apps, and how to create an app where the backend can communicate with the frontend in real time.
Normally, using HTTP requests, the server cannot push data to the client in real time. But using Socket.io, the server is able to push real time information to the client about some events that happened on the server.
The app that we’ll be building will have two pages:
A join-a-chat-room page:

And a chat-room page:

Here’s what we’ll be using to build this app:
- Frontend: React (A frontend JavaScript framework for building interactive applications)
- Backend: Node and Express (Express is very popular NodeJS framework that allows us to easily create APIs and backends)
- Database: HarperDB (a data + application platform that allows you to query data using either SQL or NoSQL. HarperDB also has a built-in API, saving us from having to write a lot of backend code)
- Realtime communication: Socket.io (see below!)
Here is the source code (remember to give it a star ⭐).
Table of Contents
- What is Socket.io?
- Project Setup
- How to Build the “Join a Room” Page
- How to Set Up the Server
- How to Create our First Socket.io Event Listener on the Server
- How Rooms Work in Socket.io
- How to Build the Chat Page
- How to Create the Messages Component (B)
- How to Create a Schema and Table in HarperDB
- How to Create the Send Message Component (C)
- How to Set Up HarperDB Environment Variables
- How to Allow Users to Send Messages to Each Other with Socket.io
- How to Get Messages from HarperDB
- How to Display the Last 100 Messages on the Client
- How to Display the Room and Users (A)
- How to Remove a User from a Socket.io Room
- How to Add the Socket.io Disconnect Event Listener
What is Socket.IO?
Socket.IO allows the server to push information to the client in real time, when events occur on the server.
For example, if you were playing a multiplayer game, an event could be your “friend” scoring a spectacular goal against you.
With Socket.IO, you’d know (almost) instantly about conceding a goal.
Without Socket.IO, the client would have to make multiple polling AJAX calls to verify that the event has occurred on the server. For example, the client could use JavaScript to check for an event on the server every 5 seconds.
Socket.IO means that the client doesn’t have to make multiple polling AJAX calls to verify if some event has occurred on the server. Instead, the server sends the info to the client as soon as it gets it. Much better. 👌
So, Socket.IO allows us to easily build real time applications, such as chat apps and multiplayer games.
Project Setup
1. How to set up our folders
Start a new project in your text editor of choice (VS Code for me), and create two folders at the root called client and server.
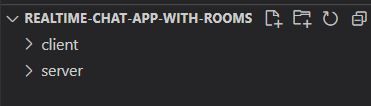
We will create our frontend React application in the client folder, and our Node/Express backend in the server folder.
2. How to install our client dependencies
Open up a terminal in the root of the project (in VS Code, you can do this by pressing Ctrl+’ or by going to terminal->new terminal)
Next, we will install React into our client directory:
$ npx create-react-app clientAfter React has installed, change directories into the client folder, and install the following dependencies:
$ cd client
$ npm i react-router-dom socket.io-client
React-router-dom will allow us to set up routes to our different React components – essentially creating different pages.
Socket.io-client is the client version of socket.io, that allows us to “emit” events to the server. Once received by the server, we can use the server version of socket.io to do stuff like sending messages to users in the same room as the sender, or join a user to a socket room.
You will gain a better understanding of this later when we come to implement these ideas with code.
3. How to boot up the React app
Let’s check to make sure everything is working by running the following command from the client directory:
$ npm startWebpack will build the React app and serve it to http://localhost:3000:

Let’s now set up our HarperDB database that we will use to permanently save messages sent by users.
How to set up HarperDB
First, create an account with HarperDB.
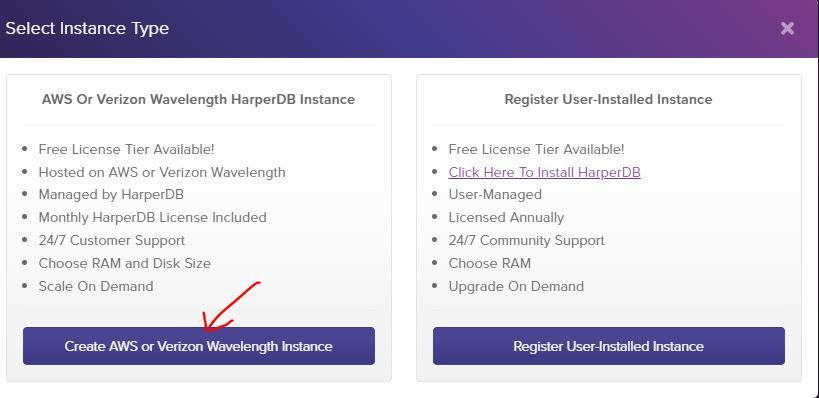
Then create a new HarperDB cloud instance:
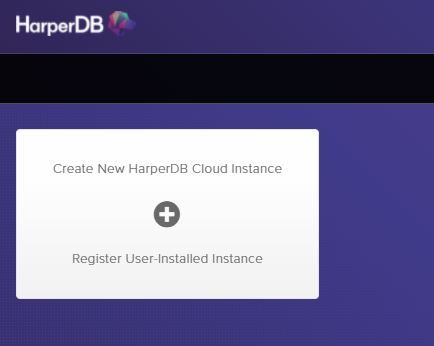
To make things easy, select the cloud instance:
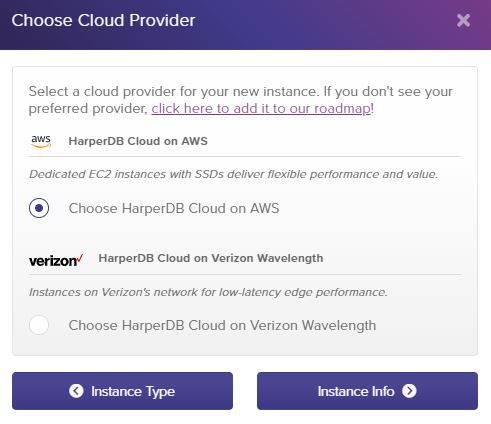
Select the cloud provider (I chose AWS):
Name your cloud instance, and create your instance credentials:
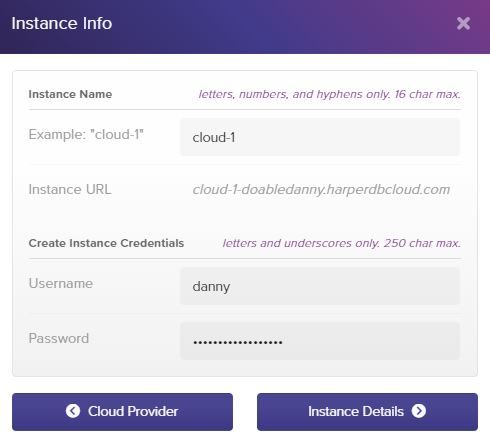
HarperDB has a generous free tier that we can use for this project, so select that:
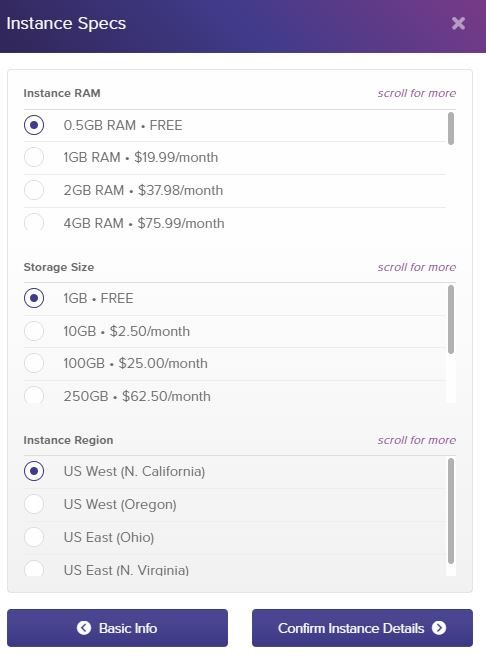
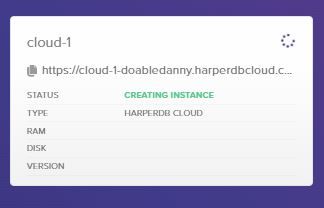
Check your details are correct, then create the instance.
It will take a few minutes to create the instance, so let’s crack on and make our first React component!
How to Build the “Join a Room” Page
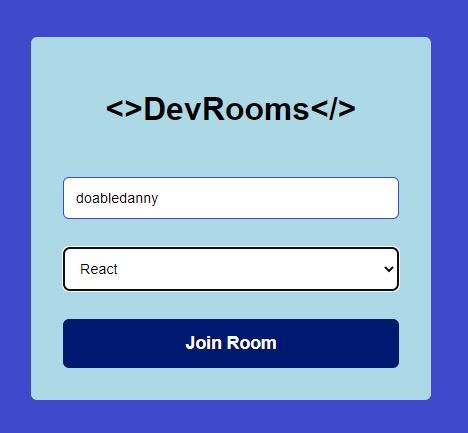
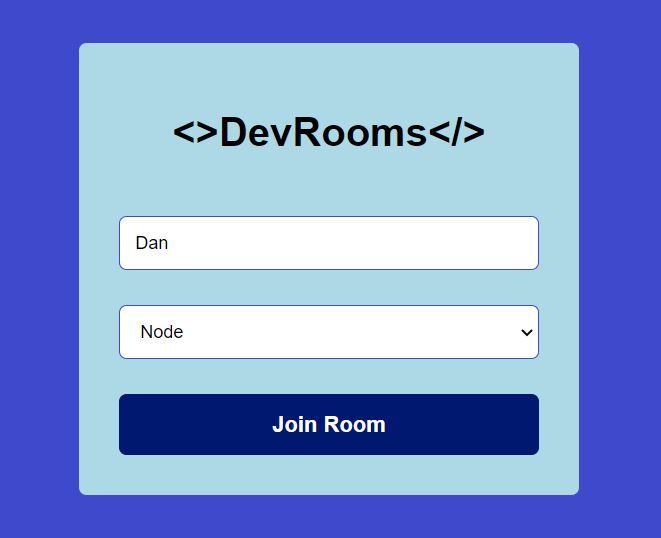
Our homepage is going to end up looking like this:
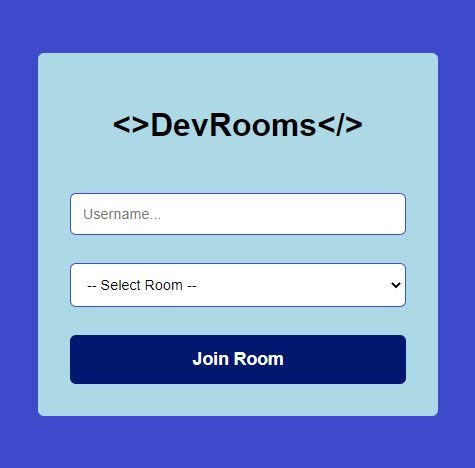
The user will enter a username, select a chat room from the dropdown, then click “Join Room”. The user will then be taken to the chat room page.
So, let’s make this homepage.
1. How to create the HTML form and add styles
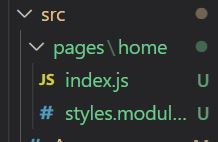
Create a new file at src/pages/home/index.js.
We will add basic styling to our app using CSS modules, so create a new file: src/pages/home/styles.module.css.
Our folder structure should now look like this:
Now let’s create the basic form HTML:
// client/src/pages/home/index.js

import styles from './styles.module.css';

const Home = () => {
  return (
    <div className={styles.container}>
      <div className={styles.formContainer}>
        <h1>{`<>DevRooms</>`}</h1>
        <input className={styles.input} placeholder='Username...' />

        <select className={styles.input}>
          <option>-- Select Room --</option>
          <option value='javascript'>JavaScript</option>
          <option value='node'>Node</option>
          <option value='express'>Express</option>
          <option value='react'>React</option>
        </select>

        <button className='btn btn-secondary'>Join Room</button>
      </div>
    </div>
  );
};

export default Home;
Above, we have a simple text input to capture the username, and a select dropdown with some default options for the user to select a chat room to join.
Let’s now import this component into App.js, and set up a route for the component using the react-router-dom package. This will be our home page, so the path will just be “/”:
// client/src/App.js

import './App.css';
import { BrowserRouter as Router, Routes, Route } from 'react-router-dom';
import Home from './pages/home';

function App() {
  return (
    <Router>
      <div className='App'>
        <Routes>
          <Route path='/' element={<Home />} />
        </Routes>
      </div>
    </Router>
  );
}

export default App;
Now let’s add some base styles to make our app look more presentable:
/* client/src/App.css */

html * {
  font-family: Arial;
  box-sizing: border-box;
}
body {
  margin: 0;
  padding: 0;
  overflow: hidden;
  background: rgb(63, 73, 204);
}
::-webkit-scrollbar {
  width: 20px;
}
::-webkit-scrollbar-track {
  background-color: transparent;
}
::-webkit-scrollbar-thumb {
  background-color: #d6dee1;
  border-radius: 20px;
  border: 6px solid transparent;
  background-clip: content-box;
}
::-webkit-scrollbar-thumb:hover {
  background-color: #a8bbbf;
}
.btn {
  padding: 14px 14px;
  border-radius: 6px;
  font-weight: bold;
  font-size: 1.1rem;
  cursor: pointer;
  border: none;
}
.btn-outline {
  color: rgb(153, 217, 234);
  border: 1px solid rgb(153, 217, 234);
  background: rgb(63, 73, 204);
}
.btn-primary {
  background: rgb(153, 217, 234);
  color: rgb(0, 24, 111);
}
.btn-secondary {
  background: rgb(0, 24, 111);
  color: #fff;
}
Let’s also add the styles specific to our home page component:
/* client/src/pages/home/styles.module.css */

.container {
  height: 100vh;
  width: 100%;
  display: flex;
  justify-content: center;
  align-items: center;
  background: rgb(63, 73, 204);
}
.formContainer {
  width: 400px;
  margin: 0 auto 0 auto;
  padding: 32px;
  background: lightblue;
  border-radius: 6px;
  display: flex;
  flex-direction: column;
  align-items: center;
  gap: 28px;
}
.input {
  width: 100%;
  padding: 12px;
  border-radius: 6px;
  border: 1px solid rgb(63, 73, 204);
  font-size: 0.9rem;
}
.input option {
  margin-top: 20px;
}
Let’s also make the “Join Room” button full width by adding a style attribute:
// client/src/pages/home/index.js

<button className='btn btn-secondary' style={{ width: '100%' }}>Join Room</button>
Our home page is now looking solid:
2. How to add functionality to the Join Room form
Now we have a basic form and styling, so it’s time to add some functionality.
Here’s what we want to happen when the user clicks the “Join Room” button:
- Check that the username and room fields are filled in.
- If so, we emit a socket event to our server.
- Redirect the user to the Chat page (which we will create later).
We are going to need to create some state to store username and room values. We also need to create a socket instance.
We could create these states directly within our home component, but our Chat page will also need access to username, room and socket. So we will lift the state up to App.js, where we can then pass these variables down to both the Homepage and Chat page components.
So, let’s create our state and set up a socket in App.js, and pass these variables down as props to the <Home /> component. We’ll also pass the set state functions so we can alter state from <Home />:
// client/src/App.js

import './App.css';
import { useState } from 'react'; // Add this
import { BrowserRouter as Router, Routes, Route } from 'react-router-dom';
import io from 'socket.io-client'; // Add this
import Home from './pages/home';

const socket = io.connect('http://localhost:4000'); // Add this -- our server will run on port 4000, so we connect to it from here

function App() {
  const [username, setUsername] = useState(''); // Add this
  const [room, setRoom] = useState(''); // Add this

  return (
    <Router>
      <div className='App'>
        <Routes>
          <Route
            path='/'
            element={
              <Home
                username={username} // Add this
                setUsername={setUsername} // Add this
                room={room} // Add this
                setRoom={setRoom} // Add this
                socket={socket} // Add this
              />
            }
          />
        </Routes>
      </div>
    </Router>
  );
}

export default App;
We can now access these props in our Home Component. We will use destructuring to get the props:
// client/src/pages/home/index.js

import styles from './style.module.css';

const Home = ({ username, setUsername, room, setRoom, socket }) => {
  return (
    // ...
  );
};

export default Home;
When the user types their username or selects a room, we need to update the username and room state variables:
// client/src/pages/home/index.js

// ...

const Home = ({ username, setUsername, room, setRoom, socket }) => {
  return (
    <div className={styles.container}>
      // ...
        <input
          className={styles.input}
          placeholder='Username...'
          onChange={(e) => setUsername(e.target.value)} // Add this
        />

        <select
          className={styles.input}
          onChange={(e) => setRoom(e.target.value)} // Add this
        >
         // ...
        </select>

        // ...
    </div>
  );
};

export default Home;
Now we are capturing the data entered by the user, we can create a joinRoom() callback function for when the user clicks the “Join Room” button:
// client/src/pages/home/index.js

// ...

const Home = ({ username, setUsername, room, setRoom, socket }) => {

  // Add this
  const joinRoom = () => {
    if (room !== '' && username !== '') {
      socket.emit('join_room', { username, room });
    }
  };

  return (
    <div className={styles.container}>
      // ...

        <button
          className='btn btn-secondary'
          style={{ width: '100%' }}
          onClick={joinRoom} // Add this
        >
          Join Room
        </button>
      // ...
    </div>
  );
};

export default Home;
Above, when the user clicks the button, a socket event called join_room is emitted, along with an object containing the user’s username and selected room. This event will be received by our server a little later on where we will do some magic.
To finish our home page component, we need to add a redirect at the bottom of our joinRoom() function to take the user to the /chat page:
// client/src/pages/home/index.js

// ...
import { useNavigate } from 'react-router-dom'; // Add this

const Home = ({ username, setUsername, room, setRoom, socket }) => {
  const navigate = useNavigate(); // Add this

  const joinRoom = () => {
    if (room !== '' && username !== '') {
      socket.emit('join_room', { username, room });
    }

    // Redirect to /chat
    navigate('/chat', { replace: true }); // Add this
  };

 // ...
Test it out: type a username and select a room, then click Join Room. You should be taken to the route http://localhost:3000/chat – currently an empty page.
But before we create our Chat Page frontend, let’s get some stuff running on the server.
How to Set Up the Server
On the server, we are going to listen out for socket events emitted from the frontend. Currently, we only have a join_room event being emitted from React, so we will add this event listener first.
But before that, we need to install our server dependencies and get the server up and running.
1. How to install the server dependencies
Open up a new terminal (in VS code: Terminal->New Terminal), change directory into our server folder, initialise a package.json file, and install the following dependencies:
$ cd server
$ npm init -y
$ npm i axios cors express socket.io dotenv- Axios is a commonly used package to easily make requests to APIs.
- Cors allows our client to make requests to other origins – necessary for socket.io to work properly. See What is CORS? if you haven’t heard of CORS before.
- Express is a NodeJS framework that allows us to write our backend more easily with less code.
- Socket.io is a library that allows the client and server to communicate in realtime – which isn’t possible with standard HTTP requests.
- Dotenv is a module that allows us to store private keys and passwords safely, and load them into our code when needed.
We will also install nodemon as a dev dependency, so we don’t have to restart our server every time we make a change to the code – saving us time and energy:
$ npm i -D nodemon2. How to boot up our server
Create a folder called index.js in the root of our server directory, and add the following code to get a server up and running:
// server/index.js

const express = require('express');
const app = express();
const http = require('http');
const cors = require('cors');

app.use(cors()); // Add cors middleware

const server = http.createServer(app);

server.listen(4000, () => 'Server is running on port 4000');
Open up the package.json file on our server, and add a script that will allow us to use nodemon in development:
{
  ...
  "scripts": {
    "dev": "nodemon index.js"
  },
  ...
}
Now, let’s boot up our server by running the following command:
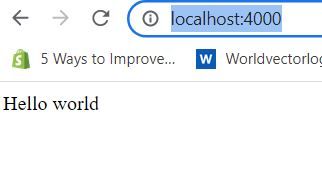
$ npm run devWe can quickly check that our server is running correctly by adding a get request handler:
// server/index.js

const express = require('express');
const app = express();
http = require('http');
const cors = require('cors');

app.use(cors()); // Add cors middleware

const server = http.createServer(app);

// Add this
app.get('/', (req, res) => {
  res.send('Hello world');
});

server.listen(4000, () => 'Server is running on port 3000');
Now go to http://localhost:4000/:
Our server is up and running. It’s now time to do some server-side Socket.io stuff!
How to Create our First Socket.io Event Listener on the Server
Remember when we emitted a join_room event from the client? Well, we are soon going to be listening for that event on the server and adding the user to a socket room.
But first, we need to listen out for when a client connects to the server via socket.io-client.
// server/index.js

const express = require('express');
const app = express();
http = require('http');
const cors = require('cors');
const { Server } = require('socket.io'); // Add this

app.use(cors()); // Add cors middleware

const server = http.createServer(app); // Add this

// Add this
// Create an io server and allow for CORS from http://localhost:3000 with GET and POST methods
const io = new Server(server, {
  cors: {
    origin: 'http://localhost:3000',
    methods: ['GET', 'POST'],
  },
});

// Add this
// Listen for when the client connects via socket.io-client
io.on('connection', (socket) => {
  console.log(`User connected ${socket.id}`);

  // We can write our socket event listeners in here...
});

server.listen(4000, () => 'Server is running on port 3000');
Now, when the client connects from the frontend, the backend captures the connection event, and will log User connected with the unique socket id for that particular client.
Let’s test if the server is now capturing the connection event from the client. Go to your React app at http://localhost:3000/ and refresh the page.
You should see the following log in your server terminal console:

Awesome, our client has connected to our server via socket.io. Our client and server can now communicate in real time!
How Rooms Work in Socket.io
From the Socket.io docs:
“A room is an arbitrary channel that sockets can
joinandleave. It can be used to broadcast events to a subset of clients.”
So, we can join the user to a room, and then the server can send messages to all users in that room – allowing users to send messages to each other in real time. Cool!
How to join the user to a Socket.io room
Once the user has connected via Socket.io, we can add our socket event listeners on the server to listen for events emitted from the client. Also, we can emit events on the server, and listen for them on the client.
Let’s now listen for the join_room event, capture the data (username and room), and add the user to a socket room:
// server/index.js

// Listen for when the client connects via socket.io-client
io.on('connection', (socket) => {
  console.log(`User connected ${socket.id}`);

  // Add this
  // Add a user to a room
  socket.on('join_room', (data) => {
    const { username, room } = data; // Data sent from client when join_room event emitted
    socket.join(room); // Join the user to a socket room
  });
});
How to send a message to users in a room
Let’s now send a message to all users in the room, apart from the user that just joined, to notify them that a new user has joined:
// server/index.js

const CHAT_BOT = 'ChatBot'; // Add this
// Listen for when the client connects via socket.io-client
io.on('connection', (socket) => {
  console.log(`User connected ${socket.id}`);

  // Add a user to a room
  socket.on('join_room', (data) => {
    const { username, room } = data; // Data sent from client when join_room event emitted
    socket.join(room); // Join the user to a socket room

    // Add this
    let __createdtime__ = Date.now(); // Current timestamp
    // Send message to all users currently in the room, apart from the user that just joined
    socket.to(room).emit('receive_message', {
      message: `${username} has joined the chat room`,
      username: CHAT_BOT,
      __createdtime__,
    });
  });
});
Above, we are emitting a receive_message event to all clients in the room the current user has just joined, along with some data: the message, username who sent the message, and the time the message was sent.
We will add an event listener in our React application a little later to capture this event, and output the message on the screen.
Let’s also send a welcome message to the newly-joined user:
// server/index.js

io.on('connection', (socket) => {
  // ...

    // Add this
    // Send welcome msg to user that just joined chat only
    socket.emit('receive_message', {
      message: `Welcome ${username}`,
      username: CHAT_BOT,
      __createdtime__,
    });
  });
});
When we add a user to a Socket.io room, Socket.io only stores the socket ids for each user. But we will need the usernames of everyone in the room, as well as the room name. So, let’s store that data in variables on the server:
// server/index.js

// ...

const CHAT_BOT = 'ChatBot';
// Add this
let chatRoom = ''; // E.g. javascript, node,...
let allUsers = []; // All users in current chat room

// Listen for when the client connects via socket.io-client
io.on('connection', (socket) => {
    // ...

    // Add this
    // Save the new user to the room
    chatRoom = room;
    allUsers.push({ id: socket.id, username, room });
    chatRoomUsers = allUsers.filter((user) => user.room === room);
    socket.to(room).emit('chatroom_users', chatRoomUsers);
    socket.emit('chatroom_users', chatRoomUsers);
  });
});
Above, we are also sending an array of all the chatRoomUsers back to the client via the chatroom_users event, so we can list all the usernames in the room on the frontend.
Before we add any more code to our server, let’s go back to our frontend and create the Chat page – so we can test out if we are receiving the receive_message events.
How to Build the Chat Page
In your client folder, create two new files:
- src/pages/chat/index.js
- src/pages/chat/styles.module.css
Let’s add some styles that we’ll use in our chat page and components:
/* client/src/pages/chat/styles.module.css */

.chatContainer {
  max-width: 1100px;
  margin: 0 auto;
  display: grid;
  grid-template-columns: 1fr 4fr;
  gap: 20px;
}

/* Room and users component */
.roomAndUsersColumn {
  border-right: 1px solid #dfdfdf;
}
.roomTitle {
  margin-bottom: 60px;
  text-transform: uppercase;
  font-size: 2rem;
  color: #fff;
}
.usersTitle {
  font-size: 1.2rem;
  color: #fff;
}
.usersList {
  list-style-type: none;
  padding-left: 0;
  margin-bottom: 60px;
  color: rgb(153, 217, 234);
}
.usersList li {
  margin-bottom: 12px;
}

/* Messages */
.messagesColumn {
  height: 85vh;
  overflow: auto;
  padding: 10px 10px 10px 40px;
}
.message {
  background: rgb(0, 24, 111);
  border-radius: 6px;
  margin-bottom: 24px;
  max-width: 600px;
  padding: 12px;
}
.msgMeta {
  color: rgb(153, 217, 234);
  font-size: 0.75rem;
}
.msgText {
  color: #fff;
}

/* Message input and button */
.sendMessageContainer {
  padding: 16px 20px 20px 16px;
}
.messageInput {
  padding: 14px;
  margin-right: 16px;
  width: 60%;
  border-radius: 6px;
  border: 1px solid rgb(153, 217, 234);
  font-size: 0.9rem;
}
Now, let’s see what our Chat page will end up looking like:
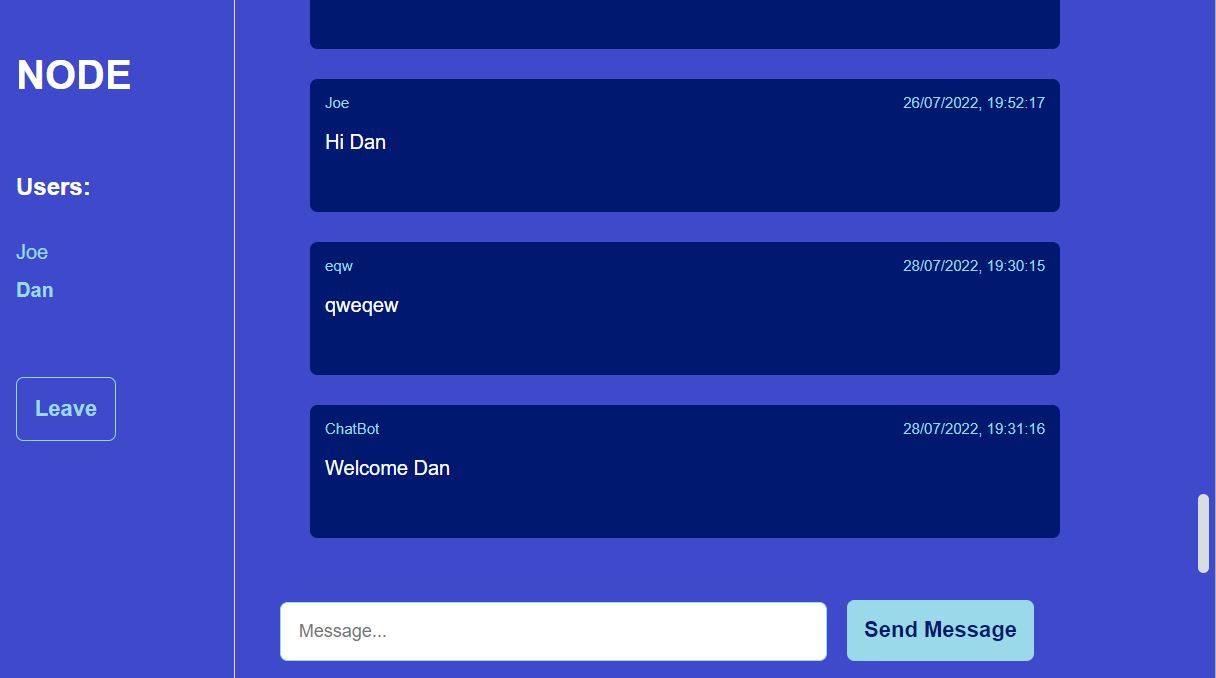
Adding all of the code and logic for this page in one file could get confusing and difficult to manage, so let’s take advantage of the fact that we are using an awesome frontend framework (React) and split our page into components:

The chat page components:
A: Contains the room name, a list of users in that room, and a “Leave” button that removes the user from the room.
B: The sent messages. Upon initial render, the last 100 messages sent in that room will be fetched from the database and shown to the user.
C: An input and button to type and send a message.
We will first create component B, so we can display messages to the user.
How to Create the Messages Component (B)
Create a new file at src/pages/chat/messages.js and add the following code:
// client/src/pages/chat/messages.js

import styles from './styles.module.css';
import { useState, useEffect } from 'react';

const Messages = ({ socket }) => {
  const [messagesRecieved, setMessagesReceived] = useState([]);

  // Runs whenever a socket event is recieved from the server
  useEffect(() => {
    socket.on('receive_message', (data) => {
      console.log(data);
      setMessagesReceived((state) => [
        ...state,
        {
          message: data.message,
          username: data.username,
          __createdtime__: data.__createdtime__,
        },
      ]);
    });

	// Remove event listener on component unmount
    return () => socket.off('receive_message');
  }, [socket]);

  // dd/mm/yyyy, hh:mm:ss
  function formatDateFromTimestamp(timestamp) {
    const date = new Date(timestamp);
    return date.toLocaleString();
  }

  return (
    <div className={styles.messagesColumn}>
      {messagesRecieved.map((msg, i) => (
        <div className={styles.message} key={i}>
          <div style={{ display: 'flex', justifyContent: 'space-between' }}>
            <span className={styles.msgMeta}>{msg.username}</span>
            <span className={styles.msgMeta}>
              {formatDateFromTimestamp(msg.__createdtime__)}
            </span>
          </div>
          <p className={styles.msgText}>{msg.message}</p>
          <br />
        </div>
      ))}
    </div>
  );
};

export default Messages;
Above, we have a useEffect hook that runs whenever a socket event is received. We then get the message data passed into the receive_message event listener. From there, we set the messagesReceived state, which is an array of message objects containing the message, username of the sender, and the date the message was sent.
Let’s import our new messages component into the Chat page, and then create a route for the Chat page in App.js:
// client/src/pages/chat/index.js

import styles from './styles.module.css';
import MessagesReceived from './messages';

const Chat = ({ socket }) => {
  return (
    <div className={styles.chatContainer}>
      <div>
        <MessagesReceived socket={socket} />
      </div>
    </div>
  );
};

export default Chat;
// client/src/App.js

import './App.css';
import { useState } from 'react';
import Home from './pages/home';
import Chat from './pages/chat';
import { BrowserRouter as Router, Routes, Route } from 'react-router-dom';
import io from 'socket.io-client';

const socket = io.connect('http://localhost:4000');

function App() {
  const [username, setUsername] = useState('');
  const [room, setRoom] = useState('');

  return (
    <Router>
      <div className='App'>
        <Routes>
          <Route
            path='/'
            element={
              <Home
                username={username}
                setUsername={setUsername}
                room={room}
                setRoom={setRoom}
                socket={socket}
              />
            }
          />
          {/* Add this */}
          <Route
            path='/chat'
            element={<Chat username={username} room={room} socket={socket} />}
          />
        </Routes>
      </div>
    </Router>
  );
}

export default App;
Let’s test this out: go to the home page and join a room:
We should be taken to the Chat page, and receive a welcome message from ChatBot:
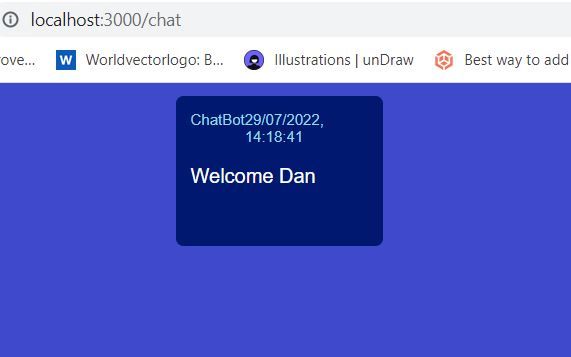
Users can now see the messages they receive. Awesome!
Next up: setting up our database so we can permanently save messages.
How to Create a Schema and Table in HarperDB
Go back to your HarperDB dashboard, and click “browse”. Then create a new schema called “realtime_chat_app”. A schema is simply a group of tables.
Within that schema, create a table called “messages”, with a hash attribute of “id”.

We now have somewhere to store messages, so let’s create the SendMessage component.
How to Create the Send Message Component (C)
Create the file src/pages/chat/send-message.js and add the following code:
// client/src/pages/chat/send-message.js

import styles from './styles.module.css';
import React, { useState } from 'react';

const SendMessage = ({ socket, username, room }) => {
  const [message, setMessage] = useState('');

  const sendMessage = () => {
    if (message !== '') {
      const __createdtime__ = Date.now();
      // Send message to server. We can't specify who we send the message to from the frontend. We can only send to server. Server can then send message to rest of users in room
      socket.emit('send_message', { username, room, message, __createdtime__ });
      setMessage('');
    }
  };

  return (
    <div className={styles.sendMessageContainer}>
      <input
        className={styles.messageInput}
        placeholder='Message...'
        onChange={(e) => setMessage(e.target.value)}
        value={message}
      />
      <button className='btn btn-primary' onClick={sendMessage}>
        Send Message
      </button>
    </div>
  );
};

export default SendMessage;
Above, when the user clicks the “Send Message” button, a send_message socket event is emitted to the server, along with a message object. We will handle this event on the server shortly.
Import SendMessage into our Chat page:
// src/pages/chat/index.js

import styles from './styles.module.css';
import MessagesReceived from './messages';
import SendMessage from './send-message';

const Chat = ({ username, room, socket }) => {
  return (
    <div className={styles.chatContainer}>
      <div>
        <MessagesReceived socket={socket} />
        <SendMessage socket={socket} username={username} room={room} />
      </div>
    </div>
  );
};

export default Chat;
The chat page now looks like this:

Next we need to set up our HarperDB environment variables so we can start interacting with the database.
How to Set Up HarperDB Environment Variables
In order for you to be able to save messages in HarperDB, you’ll need your HarperDB instance URL, and your API password.
In your HarperDB dashboard, click on your instance, then go to “config”. You will find your instance URL, and your instance API Auth Header – that is, your “super_user” password that allows you to make any request to the database – FOR YOUR EYES ONLY!

We will store these variables in a .env file. Warning: don’t push the .env file to GitHub! This file should not be publicly visible. The variables are loaded in via the server behind the scenes.
Create the following files and add your HarperDB URL and password:
// server/.env

HARPERDB_URL="<your url goes here>"
HARPERDB_PW="Basic <your password here>"
We’ll also create a .gitignore file to prevent the .env from being pushed to GitHub, along with the node_modules folder:
// server/.gitignore

.env
node_modules
Note: being good with Git and GitHub is a 100% must for all developers. Check out my Git workflows article if you need to up your Git game.
Or if you find yourself constantly having to look up the same Git commands, and want a quick way to look up, revise, and copy/paste commands — check out my popular Git commands cheat sheet PDF and physical Git cheat sheet poster.
Finally, let’s load our environment variables into our server by adding this code to the top of our main server file:
// server/index.js

require('dotenv').config();
console.log(process.env.HARPERDB_URL); // remove this after you've confirmed it working
const express = require('express');
// ...
How to Allow Users to Send Messages to Each Other with Socket.io
On the server, we’ll listen for the send_message event, then send the message to all users within the room:
// server/index.js

const express = require('express');
// ...
const harperSaveMessage = require('./services/harper-save-message'); // Add this

// ...

// Listen for when the client connects via socket.io-client
io.on('connection', (socket) => {

  // ...

  // Add this
  socket.on('send_message', (data) => {
    const { message, username, room, __createdtime__ } = data;
    io.in(room).emit('receive_message', data); // Send to all users in room, including sender
    harperSaveMessage(message, username, room, __createdtime__) // Save message in db
      .then((response) => console.log(response))
      .catch((err) => console.log(err));
  });
});

server.listen(4000, () => 'Server is running on port 3000');
We now need to create the harperSaveMessage function. Create a new file at server/services/harper-save-message.js, and add the following:
// server/services/harper-save-message.js

var axios = require('axios');

function harperSaveMessage(message, username, room) {
  const dbUrl = process.env.HARPERDB_URL;
  const dbPw = process.env.HARPERDB_PW;
  if (!dbUrl || !dbPw) return null;

  var data = JSON.stringify({
    operation: 'insert',
    schema: 'realtime_chat_app',
    table: 'messages',
    records: [
      {
        message,
        username,
        room,
      },
    ],
  });

  var config = {
    method: 'post',
    url: dbUrl,
    headers: {
      'Content-Type': 'application/json',
      Authorization: dbPw,
    },
    data: data,
  };

  return new Promise((resolve, reject) => {
    axios(config)
      .then(function (response) {
        resolve(JSON.stringify(response.data));
      })
      .catch(function (error) {
        reject(error);
      });
  });
}

module.exports = harperSaveMessage;
Above, saving the data may take a little time, so we are returning a promise which will be resolved if the data saves successfully, or rejected if not.
If you’re wondering where I got the above code, HarperDB provides an awesome “code examples” section in their studio dashboard, which makes life much easier:

Time to test! Join a room as a user, then send a message. Then go to HarperDB and click on “browse”, then click on the “messages” table. You should see your message in the database:

Cool 😎. So what next? Well, it’d be great if the last 100 messages sent in the room were loaded when a user joins a room, wouldn’t it?
How to Get Messages from HarperDB
On the server, let’s create a function that fetches the last 100 messages sent in a particular room (notice how HarperDB also allows us to use SQL queries 👌):
// server/services/harper-get-messages.js

let axios = require('axios');

function harperGetMessages(room) {
  const dbUrl = process.env.HARPERDB_URL;
  const dbPw = process.env.HARPERDB_PW;
  if (!dbUrl || !dbPw) return null;

  let data = JSON.stringify({
    operation: 'sql',
    sql: `SELECT * FROM realtime_chat_app.messages WHERE room = '${room}' LIMIT 100`,
  });

  let config = {
    method: 'post',
    url: dbUrl,
    headers: {
      'Content-Type': 'application/json',
      Authorization: dbPw,
    },
    data: data,
  };

  return new Promise((resolve, reject) => {
    axios(config)
      .then(function (response) {
        resolve(JSON.stringify(response.data));
      })
      .catch(function (error) {
        reject(error);
      });
  });
}

module.exports = harperGetMessages;
We’ll call this function whenever a user joins a room:
// server/index.js

// ...
const harperSaveMessage = require('./services/harper-save-message');
const harperGetMessages = require('./services/harper-get-messages'); // Add this

// ...

// Listen for when the client connects via socket.io-client
io.on('connection', (socket) => {
  console.log(`User connected ${socket.id}`);

  // Add a user to a room
  socket.on('join_room', (data) => {

    // ...

    // Add this
    // Get last 100 messages sent in the chat room
    harperGetMessages(room)
      .then((last100Messages) => {
        // console.log('latest messages', last100Messages);
        socket.emit('last_100_messages', last100Messages);
      })
      .catch((err) => console.log(err));
  });

 // ...
Above, if the messages are fetched successfully, we emit a Socket.io event called last_100_messages. We’ll now listen for this event on the frontend.
How to Display the Last 100 Messages on the Client
Below, we add a useEffect hook that contains a Socket.io event listener for the last_100_messages event. From there, the messages are sorted in date order, with most recent at the bottom, and the messagesReceived state is updated.
When messagesReceived is updated, a useEffect runs to scroll the messageColumn div to the most recent message. This improves the user experience of our app 👍.
// client/src/pages/chat/messages.js

import styles from './styles.module.css';
import { useState, useEffect, useRef } from 'react';

const Messages = ({ socket }) => {
  const [messagesRecieved, setMessagesReceived] = useState([]);

  const messagesColumnRef = useRef(null); // Add this

  // Runs whenever a socket event is recieved from the server
  useEffect(() => {
    socket.on('receive_message', (data) => {
      console.log(data);
      setMessagesReceived((state) => [
        ...state,
        {
          message: data.message,
          username: data.username,
          __createdtime__: data.__createdtime__,
        },
      ]);
    });

    // Remove event listener on component unmount
    return () => socket.off('receive_message');
  }, [socket]);

  // Add this
  useEffect(() => {
    // Last 100 messages sent in the chat room (fetched from the db in backend)
    socket.on('last_100_messages', (last100Messages) => {
      console.log('Last 100 messages:', JSON.parse(last100Messages));
      last100Messages = JSON.parse(last100Messages);
      // Sort these messages by __createdtime__
      last100Messages = sortMessagesByDate(last100Messages);
      setMessagesReceived((state) => [...last100Messages, ...state]);
    });

    return () => socket.off('last_100_messages');
  }, [socket]);

  // Add this
  // Scroll to the most recent message
  useEffect(() => {
    messagesColumnRef.current.scrollTop =
      messagesColumnRef.current.scrollHeight;
  }, [messagesRecieved]);

  // Add this
  function sortMessagesByDate(messages) {
    return messages.sort(
      (a, b) => parseInt(a.__createdtime__) - parseInt(b.__createdtime__)
    );
  }

  // dd/mm/yyyy, hh:mm:ss
  function formatDateFromTimestamp(timestamp) {
    const date = new Date(timestamp);
    return date.toLocaleString();
  }

  return (
    // Add ref to this div
    <div className={styles.messagesColumn} ref={messagesColumnRef}>
      {messagesRecieved.map((msg, i) => (
        <div className={styles.message} key={i}>
          <div style={{ display: 'flex', justifyContent: 'space-between' }}>
            <span className={styles.msgMeta}>{msg.username}</span>
            <span className={styles.msgMeta}>
              {formatDateFromTimestamp(msg.__createdtime__)}
            </span>
          </div>
          <p className={styles.msgText}>{msg.message}</p>
          <br />
        </div>
      ))}
    </div>
  );
};

export default Messages;
How to Display the Room and Users (A)
We’ve made components B and C, so let’s finish things off by making A.
On the server, when a user joins a room, we emit a chatroom_users event that sends all of the users in the room to all clients in that room. Let’s listen for that event in a component called RoomAndUsers.
Below, there’s also a “Leave” button that, when pressed, causes the emission of a leave_room event to the server. It then redirects the user back to the Home page.
// client/src/pages/chat/room-and-users.js

import styles from './styles.module.css';
import { useState, useEffect } from 'react';
import { useNavigate } from 'react-router-dom';

const RoomAndUsers = ({ socket, username, room }) => {
  const [roomUsers, setRoomUsers] = useState([]);

  const navigate = useNavigate();

  useEffect(() => {
    socket.on('chatroom_users', (data) => {
      console.log(data);
      setRoomUsers(data);
    });

    return () => socket.off('chatroom_users');
  }, [socket]);

  const leaveRoom = () => {
    const __createdtime__ = Date.now();
    socket.emit('leave_room', { username, room, __createdtime__ });
    // Redirect to home page
    navigate('/', { replace: true });
  };

  return (
    <div className={styles.roomAndUsersColumn}>
      <h2 className={styles.roomTitle}>{room}</h2>

      <div>
        {roomUsers.length > 0 && <h5 className={styles.usersTitle}>Users:</h5>}
        <ul className={styles.usersList}>
          {roomUsers.map((user) => (
            <li
              style={{
                fontWeight: `${user.username === username ? 'bold' : 'normal'}`,
              }}
              key={user.id}
            >
              {user.username}
            </li>
          ))}
        </ul>
      </div>

      <button className='btn btn-outline' onClick={leaveRoom}>
        Leave
      </button>
    </div>
  );
};

export default RoomAndUsers;
Let’s import this component into the Chat page:
// client/src/pages/chat/index.js

import styles from './styles.module.css';
import RoomAndUsersColumn from './room-and-users'; // Add this
import SendMessage from './send-message';
import MessagesReceived from './messages';

const Chat = ({ username, room, socket }) => {
  return (
    <div className={styles.chatContainer}>
      {/* Add this */}
      <RoomAndUsersColumn socket={socket} username={username} room={room} />

      <div>
        <MessagesReceived socket={socket} />
        <SendMessage socket={socket} username={username} room={room} />
      </div>
    </div>
  );
};

export default Chat;
How to Remove a User from a Socket.io Room
Socket.io provides a leave() method that you can use to remove a user from a Socket.io room. We are also keeping track of our users in an array on server memory, so we’ll remove the user from this array too:
// server/index.js

const leaveRoom = require('./utils/leave-room'); // Add this

// ...

// Listen for when the client connects via socket.io-client
io.on('connection', (socket) => {

  // ...

  // Add this
  socket.on('leave_room', (data) => {
    const { username, room } = data;
    socket.leave(room);
    const __createdtime__ = Date.now();
    // Remove user from memory
    allUsers = leaveRoom(socket.id, allUsers);
    socket.to(room).emit('chatroom_users', allUsers);
    socket.to(room).emit('receive_message', {
      username: CHAT_BOT,
      message: `${username} has left the chat`,
      __createdtime__,
    });
    console.log(`${username} has left the chat`);
  });
});

server.listen(4000, () => 'Server is running on port 3000');
We now need to create the leaveRoom() function:
// server/utils/leave-room.js

function leaveRoom(userID, chatRoomUsers) {
  return chatRoomUsers.filter((user) => user.id != userID);
}

module.exports = leaveRoom;
Why put this short function in a separate utils folder, you ask? Because we’ll be using it again later on and we don’t want to repeat ourselves (keeping our code DRY).
Let’s test things out: open up two windows side-by-side, and join the chat on both:
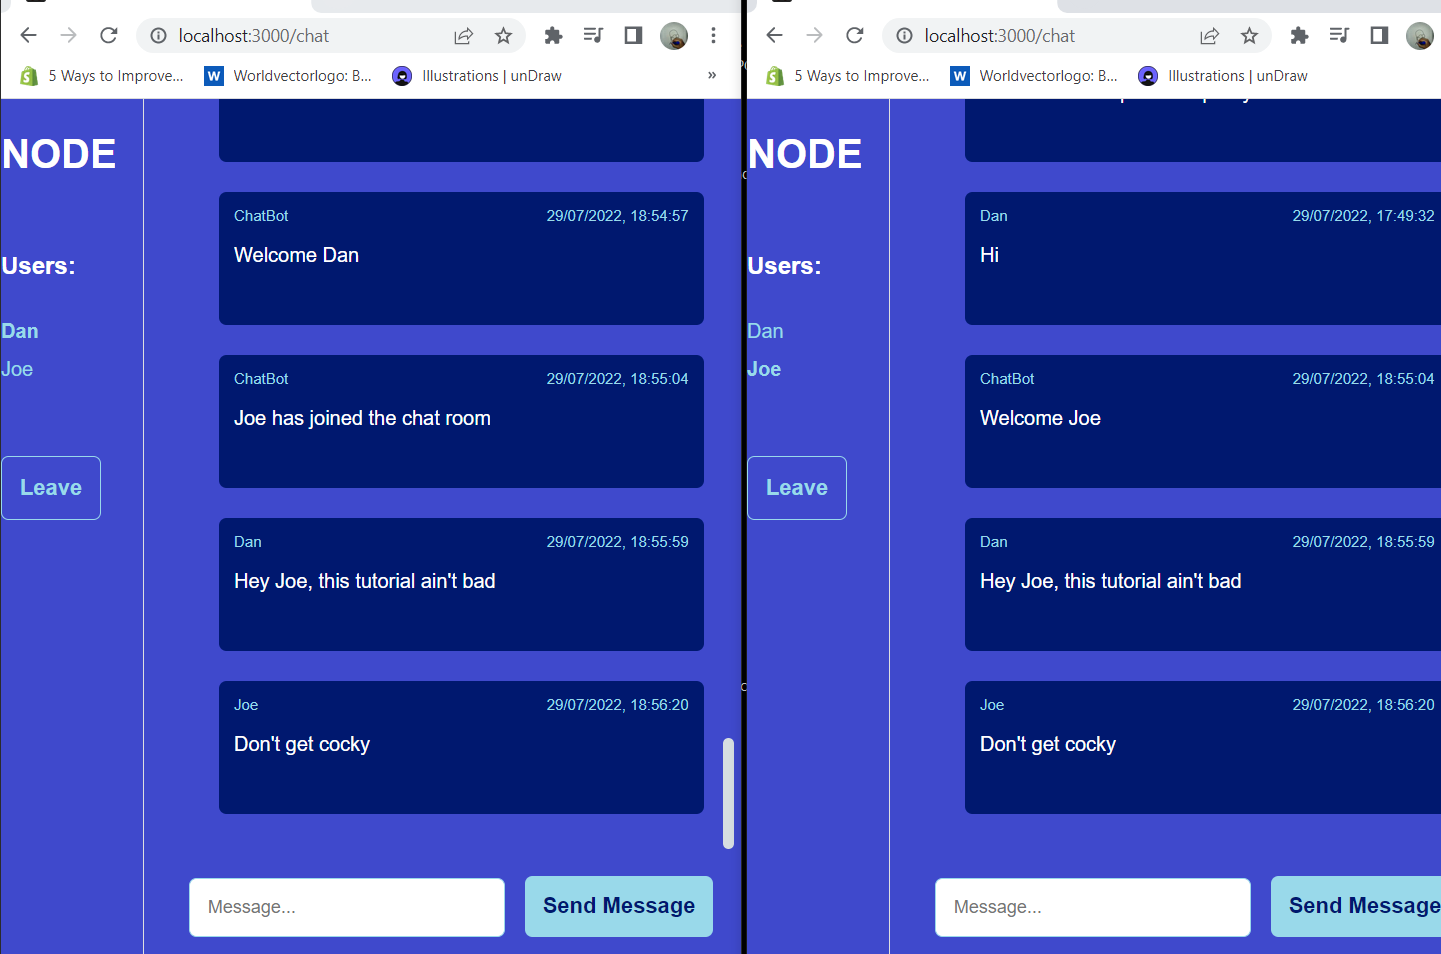
Then click the leave button on window 2:

The user is removed from the chat, and a message is sent to the other users – notifying them that they’ve left. Nice!
How to Add the Socket.io Disconnect Event Listener
What if the user is somehow disconnected from the server, like if their internet drops? Socket.io provides a built-in disconnect event listener for this. Let’s add that into our server to remove a user from memory when they disconnect:
// server/index.js

// ...

// Listen for when the client connects via socket.io-client
io.on('connection', (socket) => {

  // ...

  // Add this
  socket.on('disconnect', () => {
    console.log('User disconnected from the chat');
    const user = allUsers.find((user) => user.id == socket.id);
    if (user?.username) {
      allUsers = leaveRoom(socket.id, allUsers);
      socket.to(chatRoom).emit('chatroom_users', allUsers);
      socket.to(chatRoom).emit('receive_message', {
        message: `${user.username} has disconnected from the chat.`,
      });
    }
  });
});

server.listen(4000, () => 'Server is running on port 3000');
And there you have it – you’ve just built a fullstack realtime chat application with a React frontend, a Node/Express backend, and a HarperDB database. Nice job!
Next time, I plan to check out HarperDB’s Custom Functions, which enable users to define their own API endpoints within HarperDB. This means that we can build our entire application in one place! See an example of how HarperDB is collapsing the stack in this article.