

Creators and developers continually come up with new ways to enhance apps and provide value to users.
One feature that’s useful for social media and ecommerce apps in particular is infinite scroll. It provides a seamless and intuitive browsing experience by reducing the time it takes to see new content.
This article will teach you how to implement infinite scroll in a Next.js app using JavaScript’s Intersection Observer API.
What is Infinite Scroll?
Infinite scroll is a web design technique that allows your website or app to load more content as a user scrolls down.
For example, suppose your website has many items to display (such as a news feed or product listing). This technique eliminates the need to click through many pages, allowing users to explore and discover new content easily.
It also helps to improve the user experience by reducing the time it takes to load new pages since the content loads dynamically as the user scrolls.

You can implement it in your project using JavaScript’s Intersection Observer API.
What is the Intersection Observer API?
This browser-based API allows you to observe changes in your app’s viewport or a specific intersection between elements.
It works for use cases like lazy-loading, smooth animation transition, and infinite scrolling. You can use this API to detect when certain elements appear on your screen and trigger a function to make changes to the app.
CodeSandbox and GitHub Repo
The complete demo for this article is available on CodeSandbox. You can also check out its source code on GitHub.
Prerequisites
To smoothly follow along, you will need these first:
- Knowledge of JavaScript and React.
- A GitHub account to generate the starter code and store your code remotely. You also need Git to track changes to your codebase.
- Yarn installed on your computer. You need to have Node.js installed on your computer, which comes with NPM for installing Yarn.
- Experience with Next.js, while not required, will give you an edge and help you understand this article better.
- Familiarity with Tailwind, the CSS framework used in this project. Also not strictly required.
How to Set Up the Project
Click here to generate the starter files for this project in your preferred browser:

After generating the repo, copy its Git URL so you can clone it to your PC:
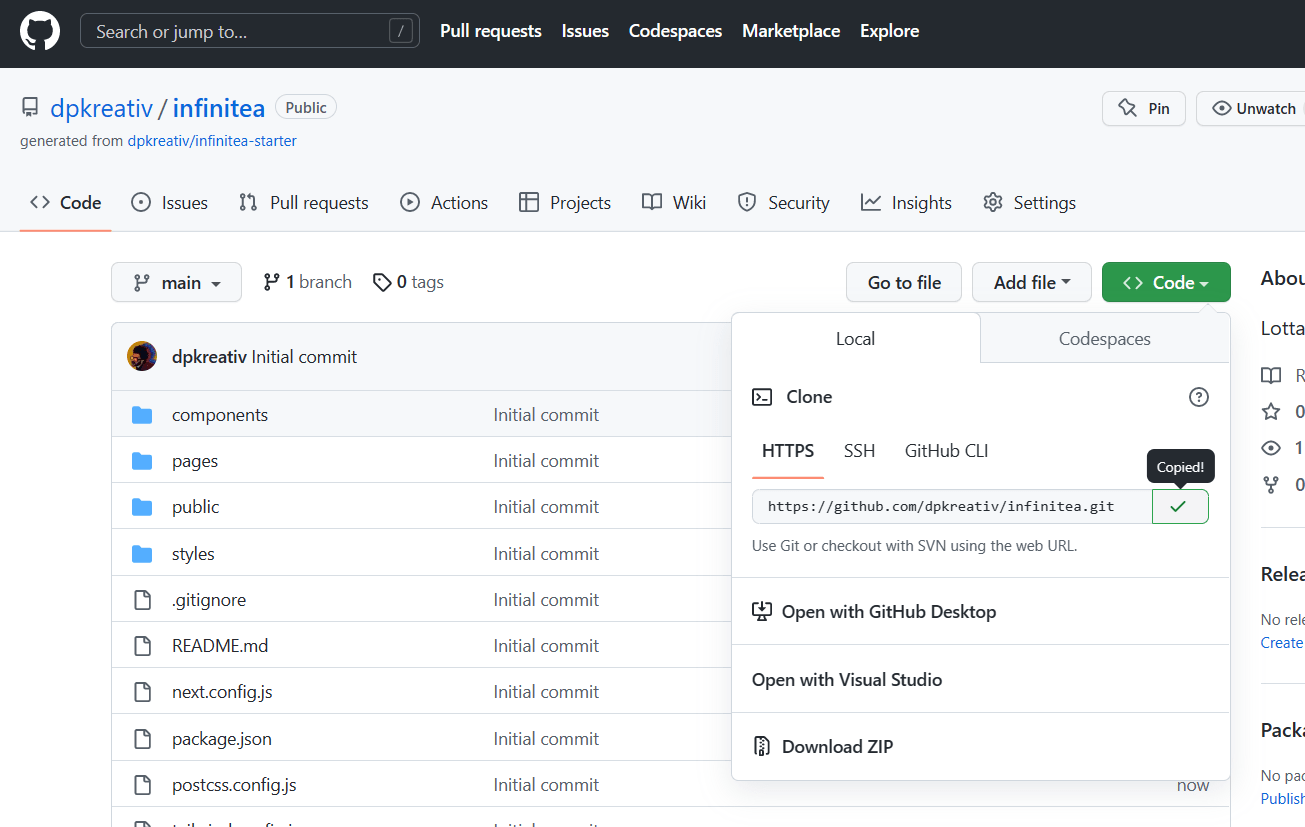
In your PC’s terminal, run the command below to clone your repo:
git clone theGitUrlOfYourRepo
After successfully cloning the project, install dependencies by running the command below in your project’s terminal:
yarn

# or npm install. But for this demo, yarn is preferred
On completion, run yarn dev in your project’s terminal, and navigate to localhost:3000 on your browser to see the starter UI:

How to Handle Content
For this project, you will get tea images from Unsplash via its public API. So navigate to https://unsplash.com/developers and click on “Register as a developer” or “Login” if you have an Unsplash account:

On successful login, click “Your apps” and “New Application”. Accept the terms of the agreement, then fill out your app’s name and description:
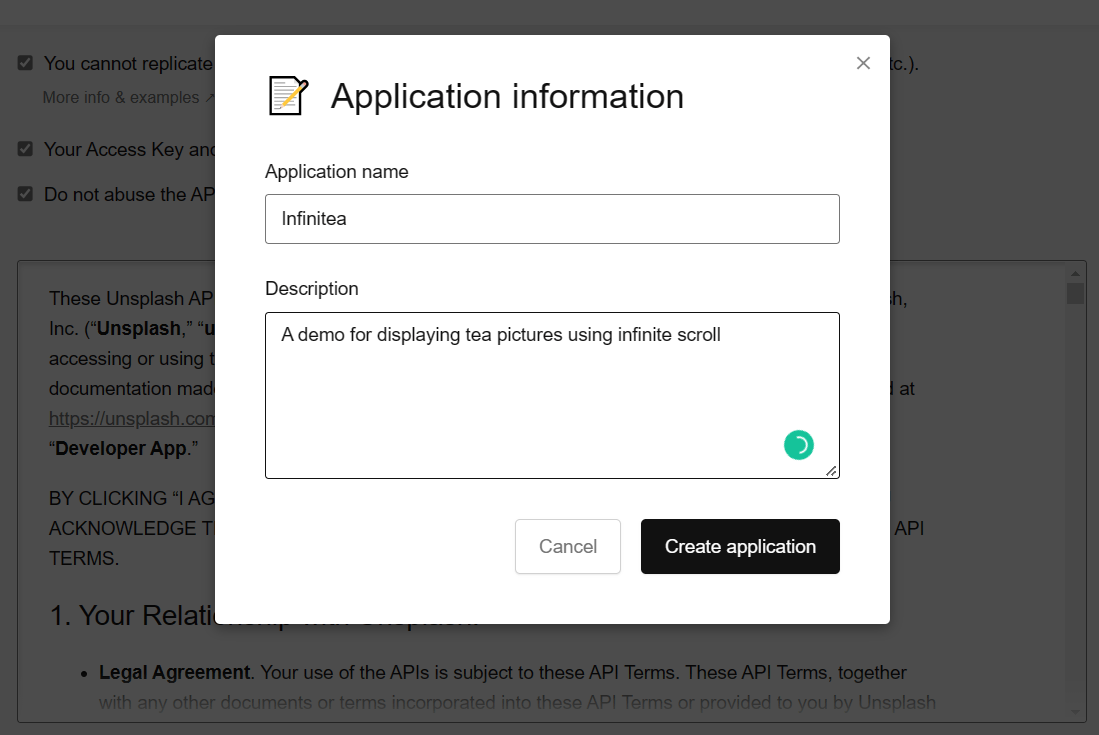
After successfully creating your app on Unsplash, scroll down to copy your Access Key.
Open your project in your preferred code editor and create a .env.local file in its root folder to store your Access Key:
NEXT_PUBLIC_UNSPLASH=yourUnsplashApiAccessKey
In your code editor, navigate to pages/index.js and update the fetchImages function with the code below:
const fetchImages = async () => {
  const response = await fetch(`${BASE_URL}?query=tea&page=${page}`, {
    headers: {
      Authorization: `Client-ID ${process.env.NEXT_PUBLIC_UNSPLASH}`,
    },
  });
  const { results } = await response.json();
  setImages((prev) => [...prev, ...results]);
};
Here, you did the following:
- Implemented JavaScript’s
fetchfunction to make an HTTP request to Unsplash’s API endpoint. The endpoint contains theBASE_URL, yourquery, and the currentpage. - In your
fetchfunction, the options object includes aheadersproperty that specifies anAuthorizationheader with a value ofClient-ID ${process.env.NEXT_PUBLIC_UNSPLASH}, which is your API Access Key. - You then parsed your
responseas JSON and destructured theresultsproperty. - Finally, you updated your
imagesstate by concatenating the previous value ofimageswith theresultsarray.
In your pages/index.js file, replace // useEffect here with the code below:
useEffect(() => {
  fetchImages();
}, [page]);
Here, you set up useEffect to trigger the fetchImages function whenever page updates.
How to Implement the Intersection Observer API
Navigate to components/ui/Card.js and update useEffect with the code below:
useEffect(() => {
  if (!cardRef?.current) return;

  const observer = new IntersectionObserver(([entry]) => {
    if (isLast && entry.isIntersecting) {
      newLimit();
      observer.unobserve(entry.target);
    }
  });

  observer.observe(cardRef.current);
}, [isLast]);
Here, you set up an Intersection Observer with the useEffect hook. It detects when each Card component becomes visible in the viewport.
When a Card component contains the last element in your images array and is visible (entry.isIntersecting), the Intersection Observer API triggers the newLimit function and stops observing the target element.
The useEffect hook will run whenever the isLast variable changes.
Update the props in your card component to contain newLimit and isLast:
export default function Card({
  creditUrl,
  imgAlt = 'placeholder',
  imgSrc = '/placeholder.jpg',
  shotBy,
  newLimit,
  isLast,
}) {
// code content
}
In your pages/index.js, update <HomeLayout> with the code below:
<HomeLayout>
  {images.map((image, index) => (
    <Card
      key={image.id}
      imgSrc={image.urls.regular}
      imgAlt={image.alt_description}
      shotBy={image.user.name}
      creditUrl={image.links.html}
      isLast={index === images.length - 1}
      newLimit={() => setPage(page + 1)}
    />
  ))}
</HomeLayout>;
Here, you mapped through your images array, rendering a list of Card components that each display the image, the photographer, and the link to the original post on Unsplash.
The isLast prop checks if the current card component is the last one in the images array. It then triggers the newLimit function from your Intersection Observer API to update the page count.
Here is the final result below:

Conclusion
In this article, you learned how to implement infinite scroll in a Next.js app. The capabilities of Intersection Observer API are not limited to infinite scroll and lazy loading. You will discover more as you keep practicing. The resources below are a good starting point.