

Having an HTTPS website is better. Not only does it offer greater security for users, but it ensures that your website will not be blocked by browsers. And the best part about SSL is that it can be completely free if you use a certificate from Let’s Encrypt.
In this article we’ll introduce you to Let’s Encrypt along with two very easy ways you can add one of their free SSL certificates to your website.
What is Let’s Encrypt?
Let’s Encrypt is a certificate authority service (provided by the Internet Security Research Group) that offers completely free SSL/TLS certificates as a part of their goal for a more secure web. They are a nonprofit organization, and all certificates issued really are free.
How Do You Use Let’s Encrypt?
Previously you had to generate a certificate and manually install it. In addition, Let’s Encrypt certificates are renewed every 90 days so in the past you’d have to remember to update your SSL certificate to maintain it.
But today installation and renewal is easy. Because of it’s popularity, there are many companies that have integrated Let’s Encrypt into their products (and even made the process automatic). So adding a Let’s Encrypt certificate is possible for any website owner.
So, let’s look at the two easiest ways to generate a Let’s Encrypt certificate and load it on your WordPress site. IN fact, it’s so easy that anyone can do it – even if you’re new to WordPress!
How to Install Let’s Encrypt Through Your Web Host
Many hosting companies offer built-in support for free SSL certificates from Let’s Encrypt. Often it’s as easy as enabling an option or selecting a proper setting.
The benefit of using a Let’s Encrypt free SSL certificate generated through your hosting company is that it’s all automatic, as your host will add the certificate and in many cases renew your certificate for you.
We can’t walk you through every compatible web host (since there are quite a few), but we can show you how Cloudways works an example.
To get started you first need to log into your web hosting account and look for the section where you can manage your SSL certificate.
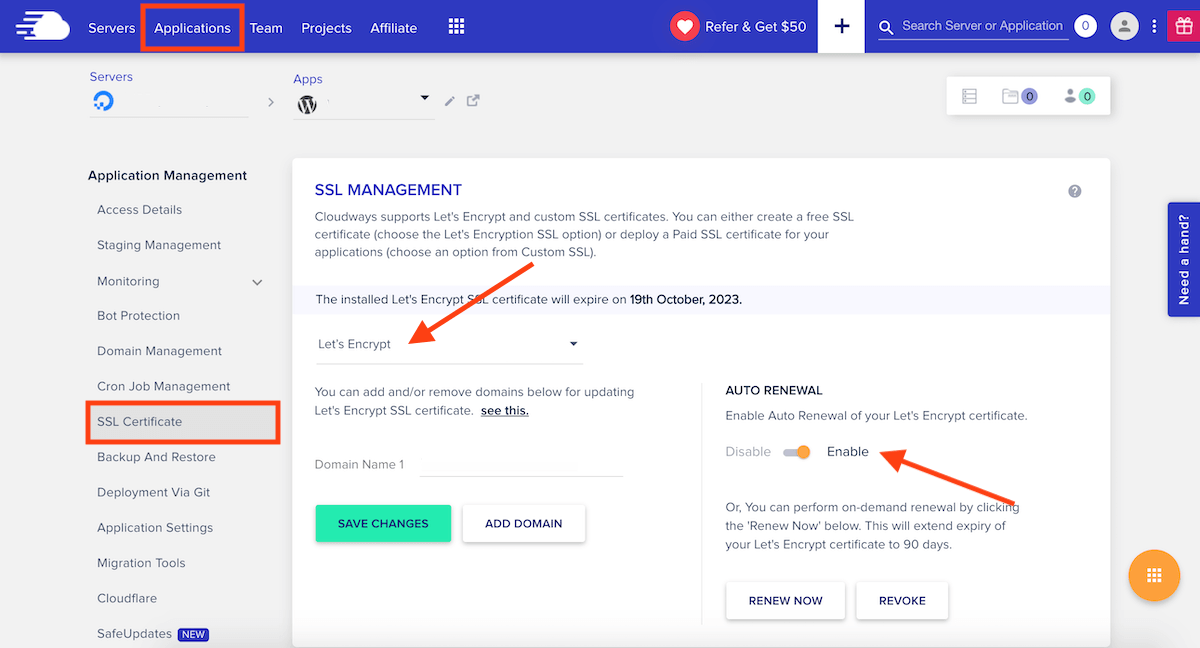
In Cloudways, the SSL Management page can be found under Applications > App (for the website you want to add a certificate to) > SSL Certificate. From here you can add and manage your SSL certificate.
For Let’s Encrypt, ensure that “Let’s Encrypt” is selected in the dropdown, then complete the fields for your email address as well as the site domain name and click on the “Install Certificate” button. That’s it! Cloudways will setup your Let’s Encrypt SSL certificate for you in minutes. The last step we’d recommend is to toggle on the Auto-Renewal setting so your certificate is always in good standing.
Most hosting companies have similar systems setup, but for your specific host’s instructions we suggest checking the documentation section for your hosting and searching for “Let’s Encrypt.” This way you can confirm if it’s provided as an option as well as find guides on how to use your host’s specific SSL integration.
How to Install Let’s Encrypt with the Really Simple SSL Plugin
If your host doesn’t offer built-in integration you can still use Let’s Encrypt easily with the help of a plugin. This is one of the simplest ways of adding a certificate if you’re on WordPress, since you can manage your certificate through WordPress.
For this option great free plugin is Really Simple SSL which can be downloaded from WordPress.org. To install it log into your WordPress site and go to Plugins > Add New then search for “really simple ssl.” The plugin should be the first result, so just click to install.
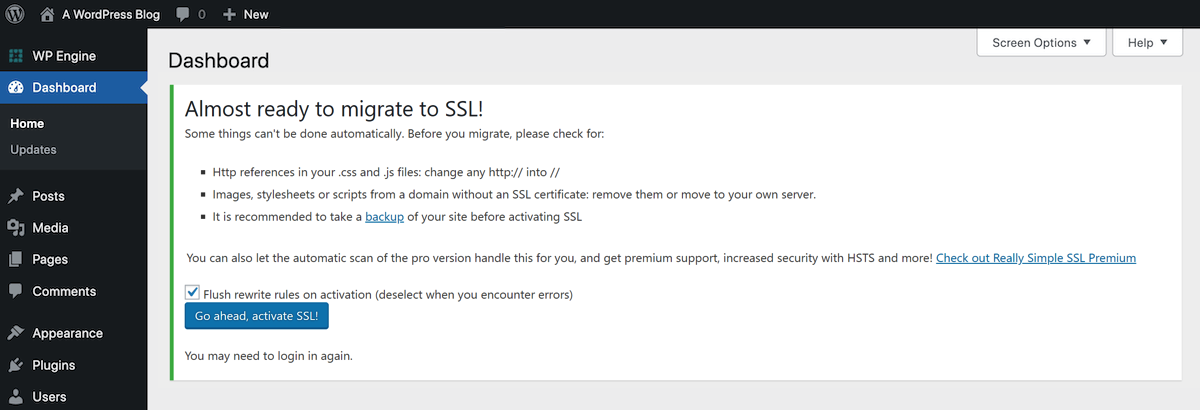
Once the plugin has been installed it should automatically attempt to start up their Let’s Encrypt Wizard. After this Really Simple SSL will scan your website domain and determine if it meets the requirements to add a Let’s Encrypt certificate. If there are no issues you should see a message like the one above prompting you to activate SSL.
But if you don’t see the Let’s Encrypt wizard right away, go to this Really Simple SSL guide. Check the list of compatible hosts to be sure that the plugin can be used with your hosting (as some hosts with built-in SSL options block the plugin). Once you confirm, scroll to the top of the page to enter your domain name and then click the link to be taken to the Let’s Encrypt Wizard directly.
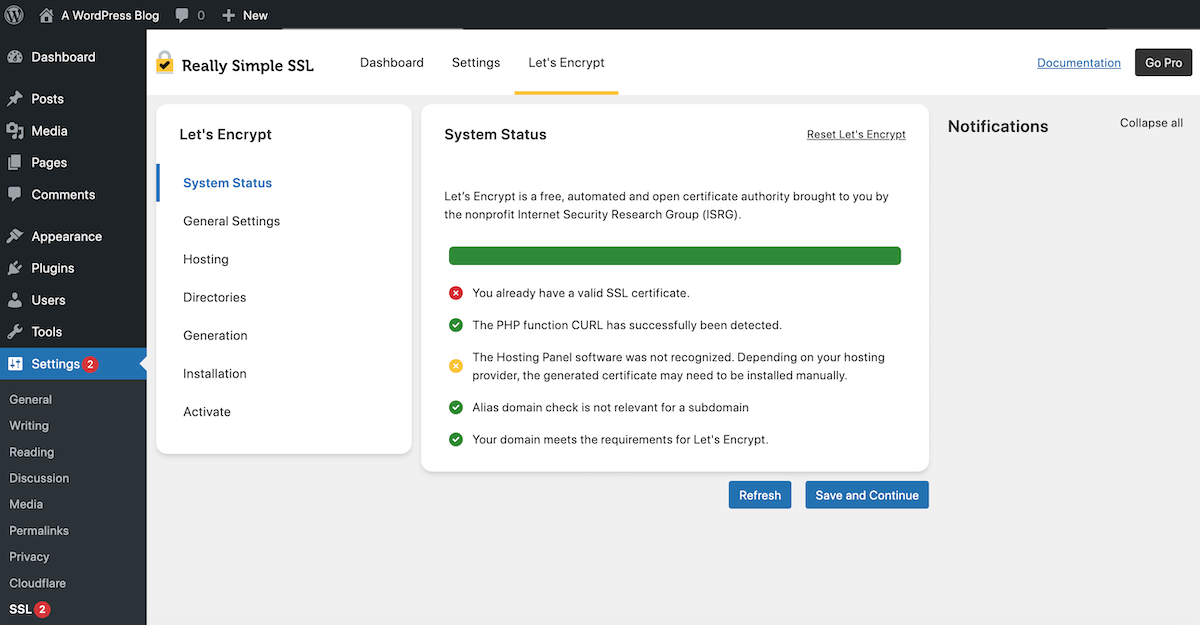
Here you will be able to see the results of the initial scan including the errors that your site has run into. Depending on the issues you should be able to troubleshoot from here (or perhaps accept defeat and move on to a different certificate method).
Really Simple SSL will also automatically attempt to renew your Let’s Encrypt certificate two weeks before it expires. If there are any issues you’ll see a notice in your WordPress dashboard. Hopefully you’ll see a success message, but on the off chance something happens you can use this guide to decipher the error notice.
Completing SSL Setup
The last step one you once your certificate is active is to double check your WordPress Settings. In the “General” tab take a look to make sure to use SSL (e.g. https://) for your URLs like so:
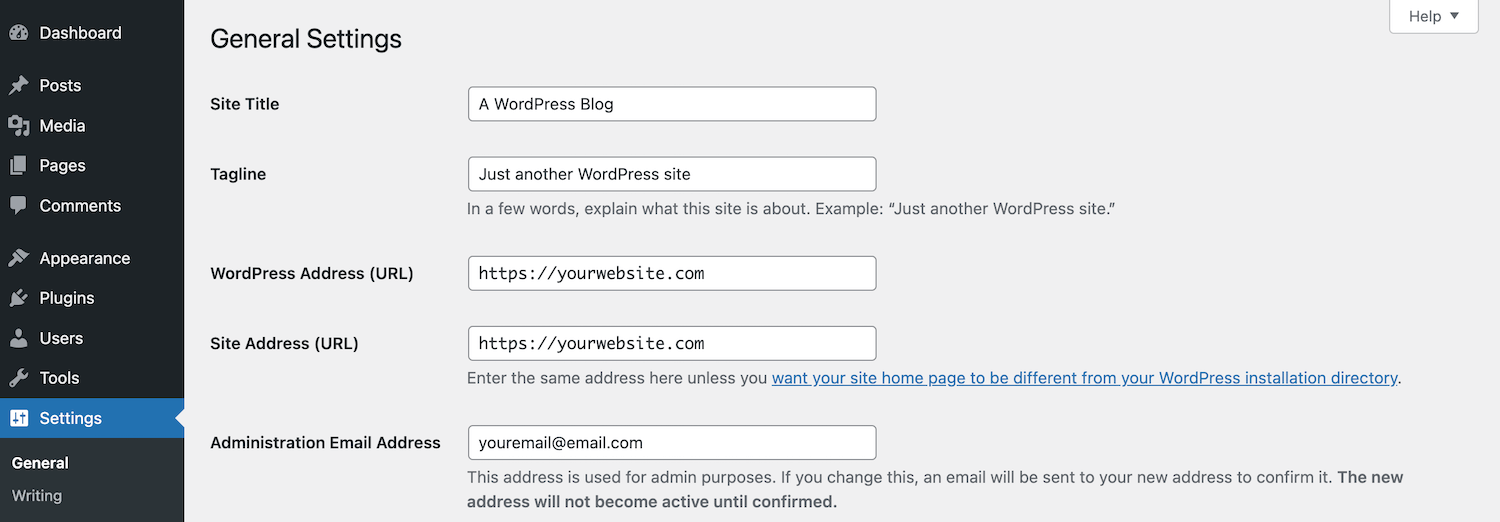
Once you click save you will have an HTTPS only site and you can begin to change your Google preferences and make further adjustments to your SEO.
Note: Our guide above is for adding HTTPS to a new WordPress site. If you are adding SSL to an existing site that has already been indexed you will also need to update existing links in your database to HTTPS and redirect HTTP traffic to the HTTPS version of your site.
With this article you’ve learned how to create and activate a free Let’s Encrypt SSL certificate for your WordPress site. Both of our preferred methods are fairly quick, so hopefully you’ll have your site using HTTPS in no time!
Of course, there are cases where a premium certificate is better (like an online store) since they will cover you in case of fraud, but for most websites free certificates are the way to go! So, have you upgraded your WordPress installation to HTTPS? What are your thoughts? Tell us in the comments below.