

In this article, we are going to explain how you can easily install and set up WordPress multisite. So if you are running multiple WordPress sites on sub-domains and wanted to manage all their sites together, we will show you how to install and set up WordPress multisite network.
What is WordPress Multisite?
A WordPress multisite network allows you to run and manage multiple WordPress sites from a single WordPress installation. You can create new sites instantly and manage them using the same username and password. You can even allow other users to signup and create their own blogs on your domain.
Advantages of using a Multisite Network
- As the network admin, you can easily administer multiple sites from a single dashboard.
- Each site can have its own admins with capabilities to manage only their own site.
- Install plugins and themes on multiple sites with one download.
- Multisite network also makes it easier for you to manage updates. You only need to update your WordPress, plugins, or themes on one install.
- All the sites on the network share the same resources, so when your site is down, all sites on your network are down.
- Managing server resources in case of unexpected traffic can be difficult for a beginner level user.
- If your site gets hacked, then this means all the sites on your network will get hacked.
- Some WordPress plugins may not work well on a multisite network.
- A magazine site with different sections managed by different teams.
- A business site with sub-sites for different locations and branches.
- Government or non-profit sites can use multisite for different departments, locations, and regions.
- Your own network of blogs running on multiple subdomains.
- Schools and colleges allowing students to create their own blogs on school servers.
Disadvantages of using a Multisite Network
Who Needs a WordPress Multisite Network
Just because you have multiple WordPress installation does not mean that you need to create a multi-site network. You can use services like ManageWP or InfiniteWP to manage multiple different sites.
Creating a multisite network makes sense for:
Requirements for a WordPress Multisite Network
The most important thing you will need to run a WordPress multisite network is good WordPress hosting. If you are not planning to create many sites and do not expect many visitors, then you can get away with shared hosting. However, due to the nature of multi-sites, you’d probably need a VPS or dedicated server as your sites grow.
Apart from web hosting, you will need some basic knowledge of installing WordPress and editing files using FTP.
Choosing a Domain Structure for Your Multisite Network
On a WordPress multisite network, you can have your sites installed as either subdomains or subdirectories, for example:-
http://sitename.example.com
http://example.com/sitename/
If you choose subdomains, then you will have to configure wildcard subdomains on your server.
On the other hand, if you choose sub-directories or path based URLs for sub-sites on your network, then the only thing you need to do is enable pretty permalinks on your root site.
Enabling WordPress Multisite Network Feature
Multisite Network feature comes built-in with each WordPress install. All you need to do is install and set up WordPress like you normally would.
You can also enable the Multisite feature on an existing WordPress site. Before you enable multisite, make sure that you have created a full backup of your WordPress site.
To enable Multisite, you need to access your site using an FTP client or cPanel file manager and open wp-config.php file for editing.
You need to add this line to your wp-config.php file just before the /* That’s all, stop editing! Happy blogging. */ line.
define( 'WP_ALLOW_MULTISITE', true );
Save and upload your wp-config.php file back to the server. Now your WordPress site supports a multisite network.
Setting up The Network
Now that you have successfully enabled the Multisite Network feature on your WordPress site, it is time to set up your network. Before you do that, the first thing you need to do is deactivate all plugins on your site. After that, you need to go to Tools > Network Setup to configure your multisite network.
On the network setup screen, you will see a notice that you need Apache’s mod_rewrite module installed on your server to set up a multisite network. This module is installed and enabled on most reputable WordPress hosting providers.
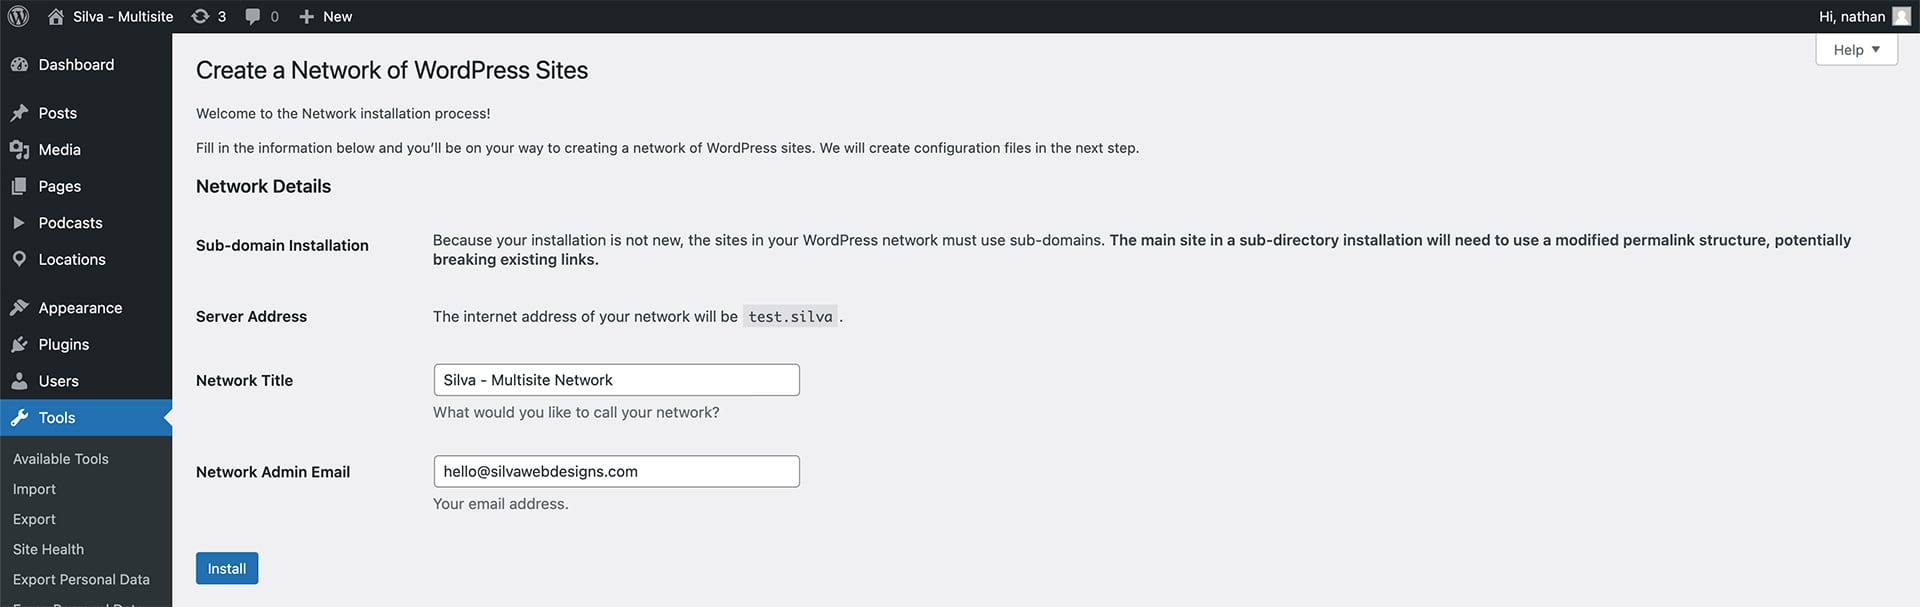
The next thing you need to do is to tell WordPress what kind of domain structure you will be using for sites in your network, e.g. Subdomains or Sub-directories. After that, you would need to provide a title for your Network and make sure that the email address in the Network Admin Email is correct. Lastly, click on the install button to continue.
On the next screen, WordPress will show you some rules that you need to add to your wp-config.php and .htaccess file. Use an FTP client to edit those two files and copy-paste the code.
Configuring Network Settings
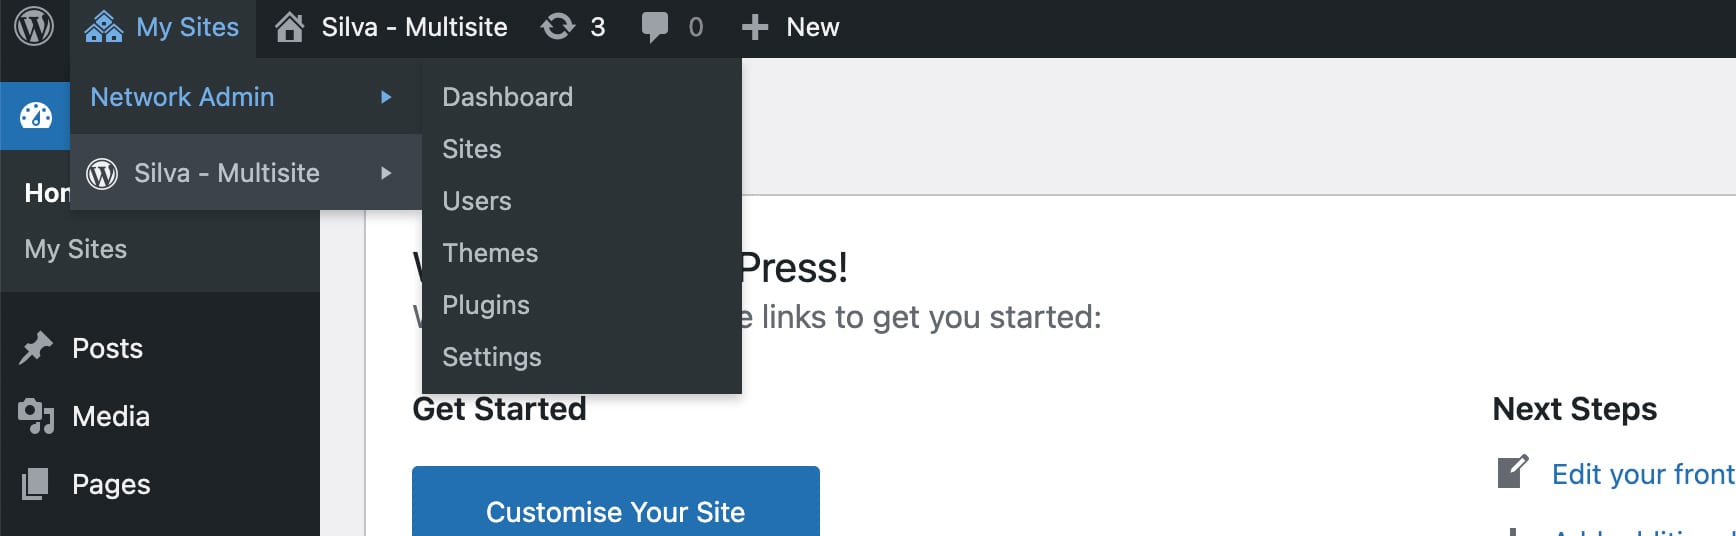
After successfully setting up the Multisite Network, you need to switch to the Network Dashboard to configure network settings, add new sites, and do lots of other things. Take your mouse over to My Sites menu in the admin toolbar, a fly down popup will appear. Click on Network Admin > Dashboard.
You will notice that there are new menu items to manage your multisite network. You will also see a dashboard widget allowing you to create a new site and add new users.
To configure Network Settings click on the Settings link in the admin sidebar. On the network settings screen, the first option is to set your site title and admin email address. These fields will be filled with the network title and admin email you entered during the network setup.
Opening Your Multisite Network for Registrations
The Registration Settings section on the network settings screen is probably the most important setting in your network setup. By default, both user and site registrations will be disabled on the network. You can choose to open your site for user registration, or allow existing users to create new sites, or allow both user and site registration.
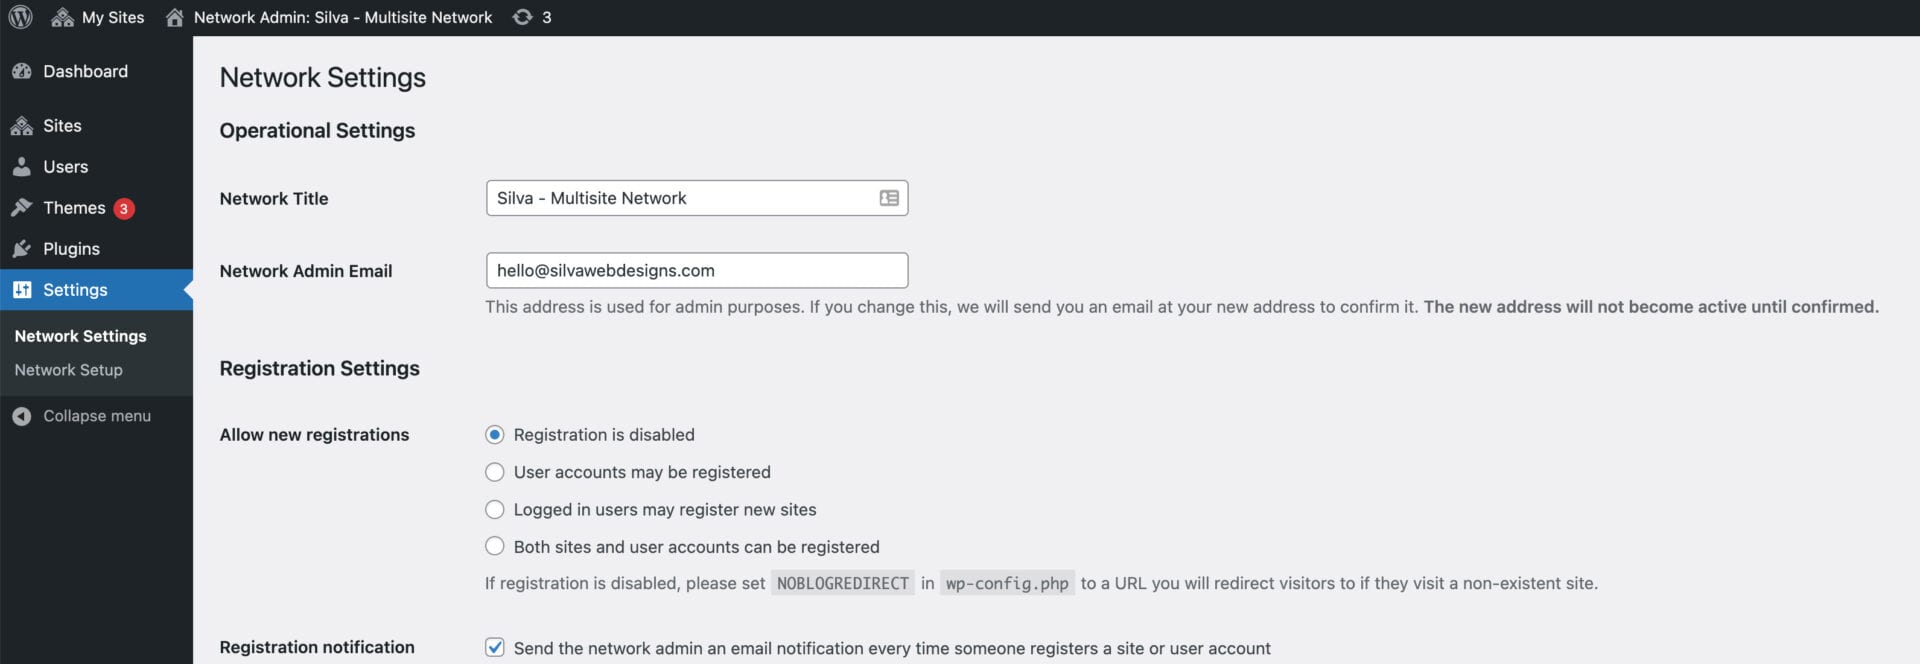
You can check the box next to Registration Notification to receive email notifications every time a new user or site is registered.
If you want to allow the site administrators the ability to add new users to their sites, then you can check the box next to Add New Users.
Limited Email Registration options will allow you to limit site or user registration to the email address from specific domains, then you can add those domains here. This is particularly useful if you only want to allow people from your own organisation to register and create users or sites. Similarly, you can also ban certain domains from registration.
New Site Settings
The New Site Settings section on the network settings screen allows you to configure default options for the new sites created on your network. You can modify the welcome emails and the contents of the first default post, page, and comment.

Upload Settings for Your Multisite Network
It is important for you to keep an eye on the usage of the server resources. Under the Upload Settings section, you can limit the total amount of space a site can use for uploads. The default value is 100 MB which is probably good for at least 100 photo uploads. You can increase or decrease this space depending on how much disk space you have.
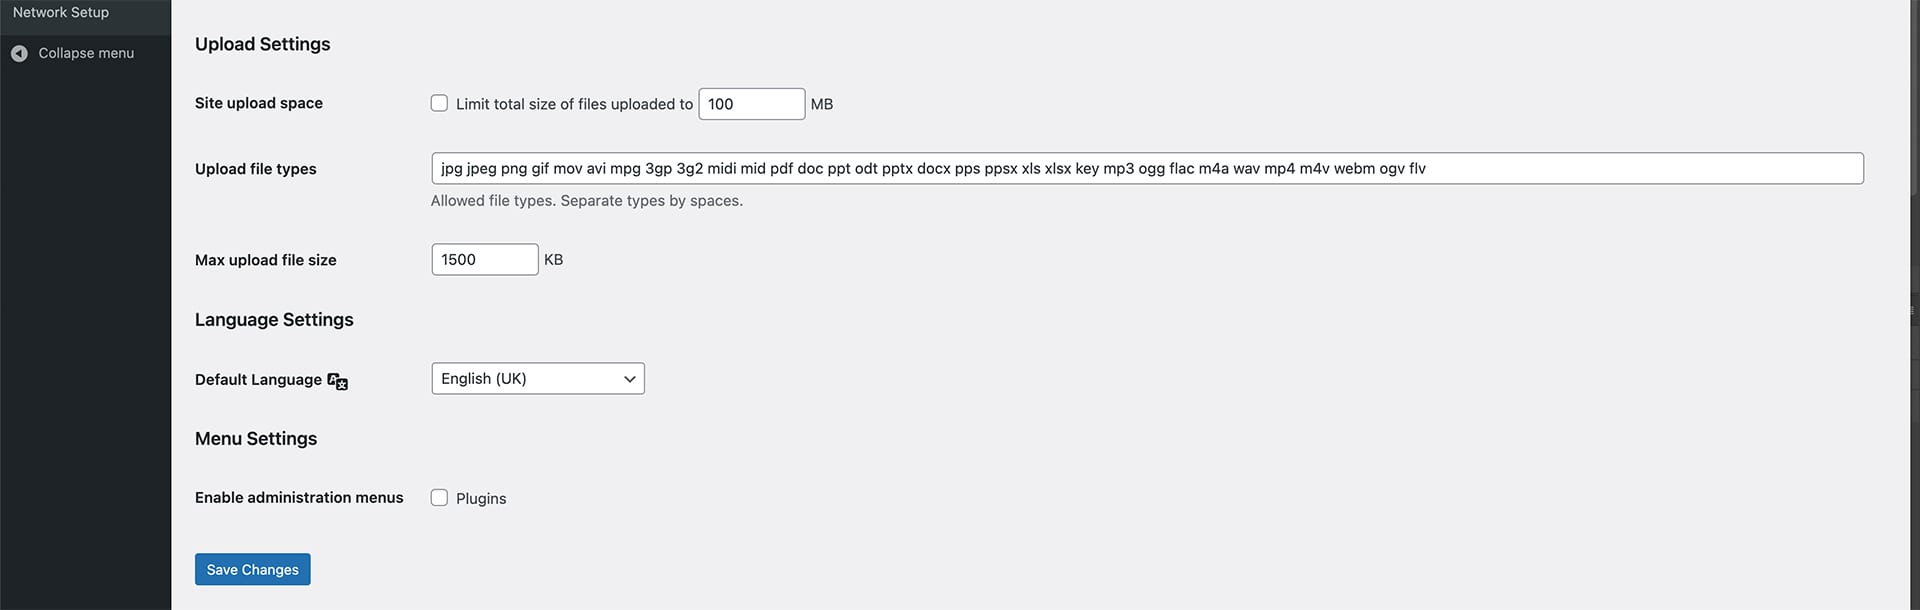
The default upload file types are images, audio/video, and pdfs. You can add additional file types if you want, e.g. doc docx odt. Lastly, you can choose a file size limit, so that users can’t upload insanely large files to the server.
Menu Settings
Under the menu settings, you will find the option to enable the administrative menu for the plugins section on the network sites. Enabling this will show the plugins menu to site admins. They can activate or deactivate a plugin on their individual sites, but they cannot install new plugins.
Adding New Sites to Your WordPress Multisite Network
To add a new site to your WordPress multisite, simply click on Sites under My Sites » Network Admin » Sites menu in the admin toolbar.
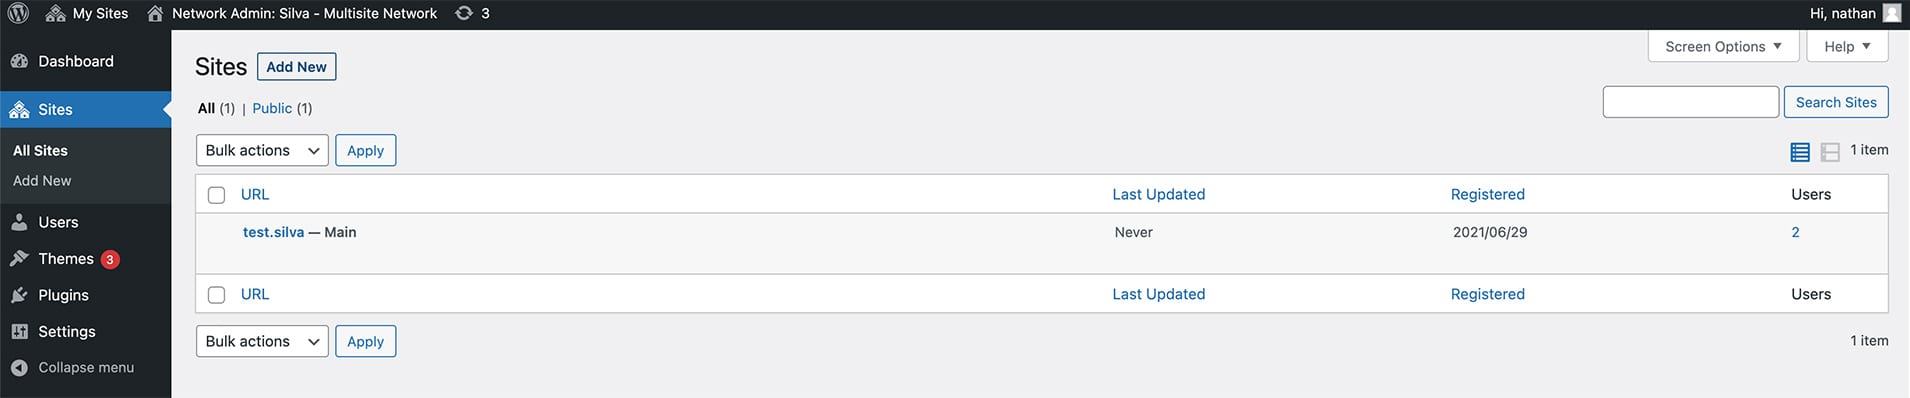
This will show you a list of sites on your current Multisite installation. By default, you have your primary site listed as the only site in your WordPress Multisite network. To add a new site, click on the Add New button at the top.
On the Add New Site screen, you need to provide the site’s address. You don’t need to type the full address, just the part you want to use as a subdomain or sub-directory. After that provide a site title, and add the site’s admin email address.
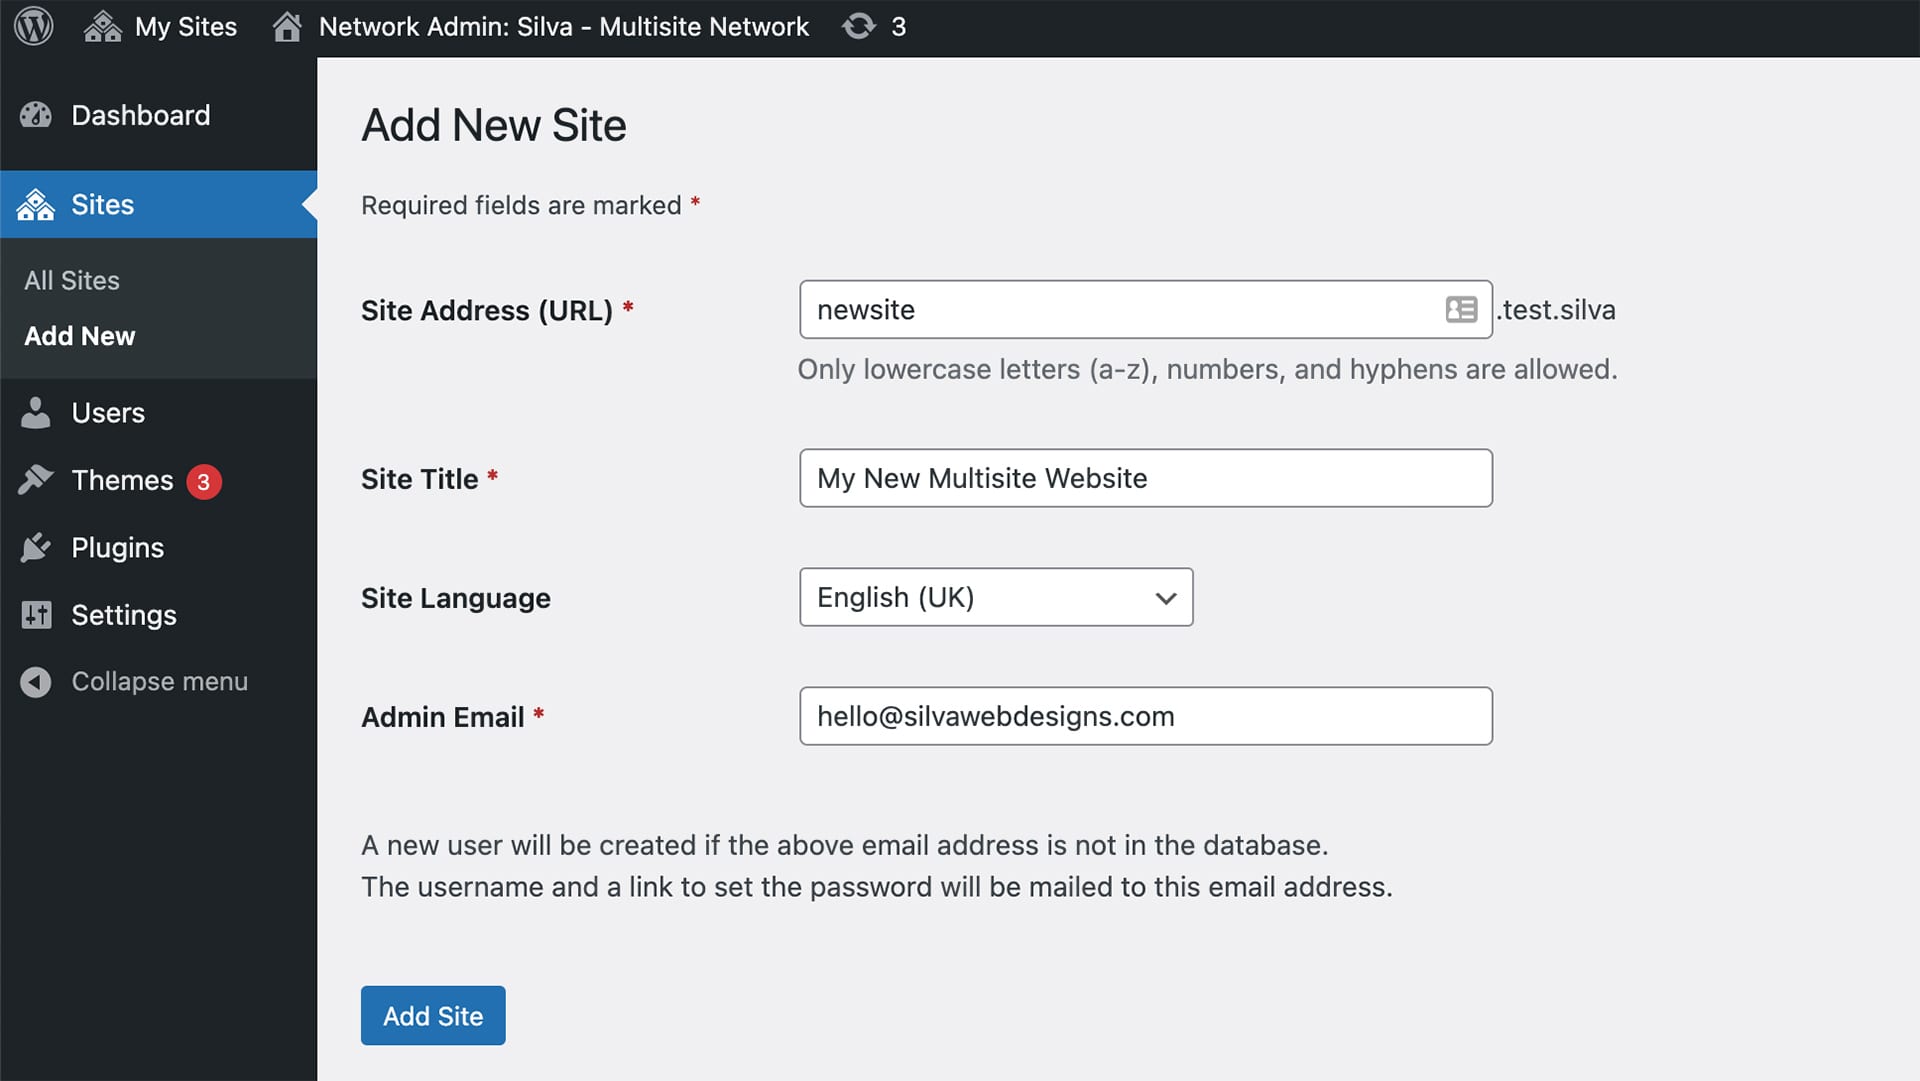
You can add an admin email address other than the one you are currently using to manage your multisite. If the email address is not currently in use by another user on your site, then WordPress will create a new user and send the password and username to the email address you enter.
Once you are done, click on the Add Site button. A new site will be added to your multisite network. As the network admin, you will receive a new site registration email. If you created a new user, then that user will receive their username and password with instructions to log in on the email address you provided.
Adding Themes and Plugins to Your Multisite Network
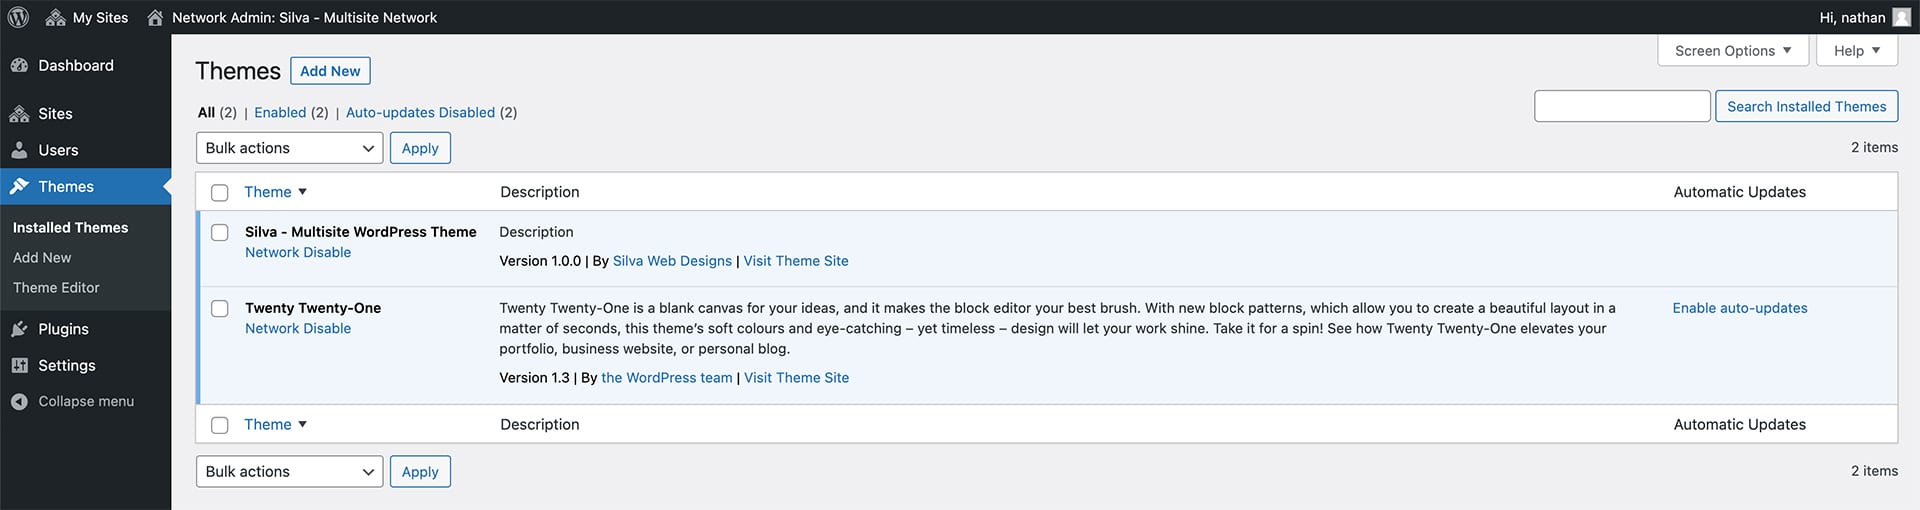
By default, individual site administrators cannot install themes and plugins on their own. As the network admin, you can install plugins and themes for them and make those themes/plugins available to them. To do that you need to login to your primary site and go to My Sites > Network Admin > Themes.
On the Network Admin’s themes screen, you will see a list of the currently installed theme on your WordPress multisite. You can make a theme available to other sites by clicking on Enable Network under that theme. Similarly, you can disable a theme by clicking on the Disable Network link under the theme.
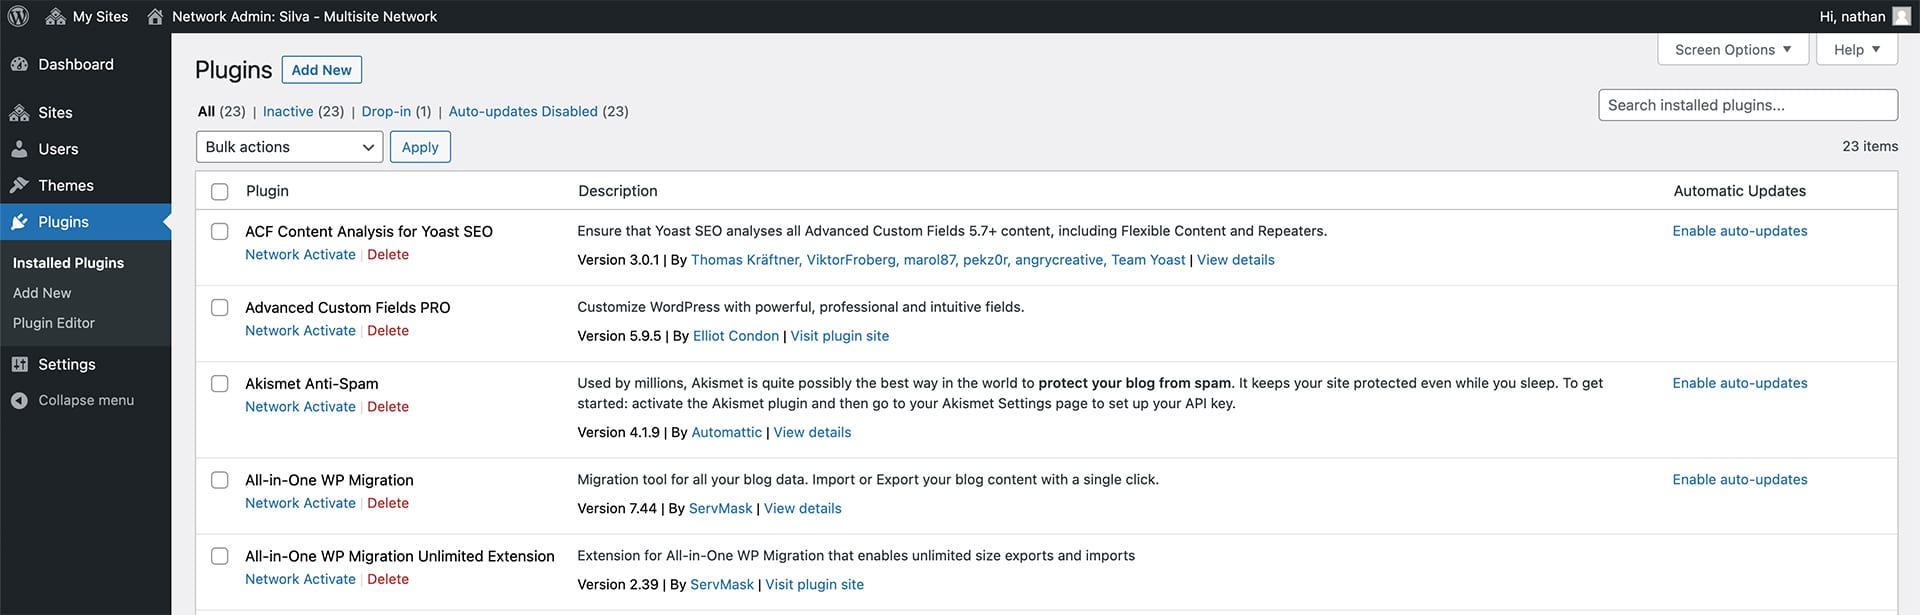
Similarly, you can activate or deactivate a plugin for the whole network from My Sites > Network Admin > Plugins screen. Note that if you have checked the Plugins Menu as available to site admins in the Network Settings, then site administrators can activate or deactivate installed plugins on their own.
Troubleshooting WordPress Multisite Issues
Most common issues occur due to incorrect configuration of Wildcard Subdomains. Make sure that your web host supports wildcard subdomains.
Another common issue is that when using WordPress Multisite with sub-directories, some users are unable to log in to the admin area of their sites after they add the required code in wp-config.php file. To fix this, try replacing the following line in the wp-config.php file:-
define('SUBDOMAIN_INSTALL', false);
with:-
define('SUBDOMAIN_INSTALL', 'false');
If you’re still having problems, feel free to email us to leave a comment below. We sure hope this article helps!